Create Docker repository on Nexus and push to it
Back to projects
Build and Push Docker image to Docker repository on Nexus
Technologies
Project Description:
- Create Docker hosted repository on Nexus - Create Docker repository role on Nexus - Configure Nexus, DigitalOcean Droplet and Docker to be able to push to Docker repository - Build and Push Docker image to Docker repository on Nexus
Chapter 1: Setup Nexus on Droplet
(same firewall/ssh key steps)
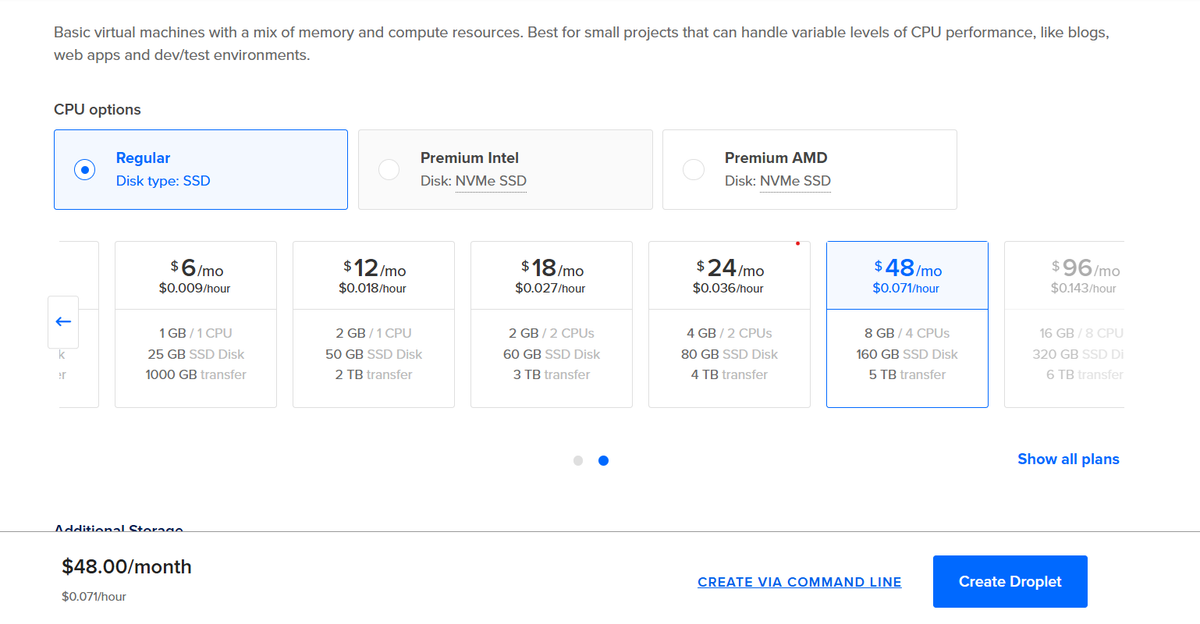
Step 1: Create droplet
For our droplet to be able to handle Nexus effectively, we need to allocate atleast 8GB of ram/4 CPUS... for that we choose the below plan:
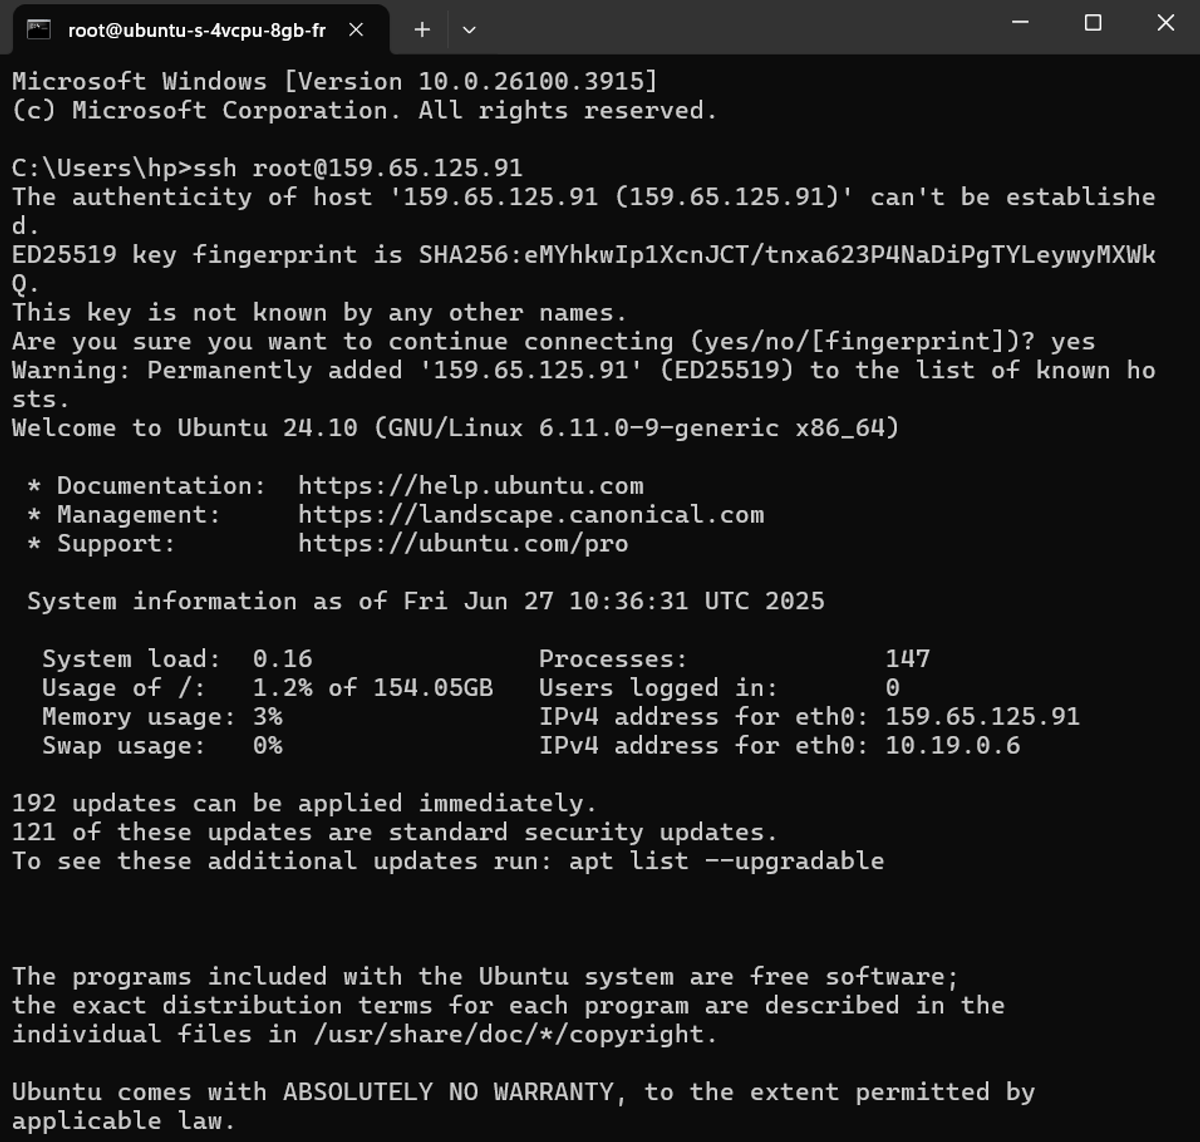
Step 2: SSH into the server
Step 3: Download Nexus on Droplet
![[Pasted image 20250627114346.png]]
Step 4: Decompress/Extract files from the tar bundle
![[Pasted image 20250627115655.png]]
Step 5: Create a user that is the only one able to manage Nexus
We do this to follow the **Principle of Least Privilege (PoLP)** principle, where we create a separate user for each service (Nexus in this case), which enables us to limit the damage if the service gets compromised.
![[Pasted image 20250627120603.png]]
Step 6: Change `nexus` and `sonatype-work` folders permissions and owner to be restricted to only the nexus user/group
![[Pasted image 20250627122512.png]]
Step 7: Ensure Nexus is started ONLY as `nexus` user
If Nexus gets hacked, this step will prevent the hacker from accessing anything outside `/opt/nexus` and `/opt/sonatype-work` (Can't touch system files, kill other system services etc...)
![[Pasted image 20250627124336.png]]
![[Pasted image 20250627124323.png]]
Step 8: Run Nexus
![[Pasted image 20250627133841.png]]
verify it's running:
![[Pasted image 20250627133902.png]]
(it's listening on port 8081)
Step 9: Include port 8081 in the firewall inbound rules
Navigate to Networking => Firewall tab and modify your firewall that is connected to your droplet (or create a new firewall), and a new inbound rule for TCP, port 8081 and allow all IPV4/IPV6 connections.
Hit save, make sure that the firewall is applied to the droplet and exit
![[Pasted image 20250627134354.png]]
## Step 10: Access the nexus dashboard page through the web
we access http://159.65.125.91:8081/ (replace the IP address with your droplet IP address), we see this:
![[Pasted image 20250627134743.png]]
we then login with the admin account
Chapter 2: Setup nexus docker repository
Step 1: Create docker repository in Nexus
We navigate to settings => repositories => Create Repository and we choose "docker (hosted)"
![[Pasted image 20250705155244.png]]
We name it "docker-hosted" and leave everything else as it and click "Create repository" in the bottom of the page
![[Pasted image 20250705155507.png]]
Step 2: Create role that gives the privileges to access the docker repository
We navigate to Settings => Security => Roles => Create Role and fill the details for the privileges we select `nx-repository-view-docker-docker-hosted-*` , leave everything else as it and click "Save"
![[Pasted image 20250705173923.png]]
Step 3: Create a new nexus user and assign the created role to it
We navigate to Settings => Security => Users => Create User then fill the basic info and assign this user the `nx-docker` role we created in Step 2
![[Pasted image 20250705174118.png]]
Step 4: Create an HTTP connector at port 8083
Edit the `docker-hosted` repository by enabling HTTP connector and setting the port to 8083
This will allow us to push our docker images to our docker repository hosted in our Nexus server through port 8083.
![[Pasted image 20250705174727.png]]
Step 5: Create firewall inbound rule that allows connections through port 8083 of our Digital Ocean droplet
We navigate to Networking => Firewalls and edit our firewall that is applied to our droplet by adding an inbound rule that allows connections through port 8083
![[Pasted image 20250705175145.png]]
Step 6: Activate `Docker Bearer Token` realm
We navigate to Settings => Security => Realms and activate `Docker Bearer Token` and click save. This will allow Nexus to issue authentication tokens compatible with the Docker client, enabling secure push and pull operations from Docker CLI
![[Pasted image 20250705180137.png]]
Step 7: Allow our nexus docker repository url that's running on port 8083 to be an exception insecure registry
Since our nexus server is using HTTP instead of HTTPS, we need to configure docker so that it allows us to push/pull to that endpoint by adding the line: `"insecure-registries": ["165.22.73.173:8083"]`
Then click Apply and Restart
![[Pasted image 20250705180813.png]]
Step 8: Login to the Nexus docker repository from our local machine:
We run the command `docker login 165.22.73.173:8083`, which will allow Docker to authenticate with the Nexus Docker registry using the provided credentials and obtain a bearer token — enabling secure access for pushing and pulling images to and from the private registry, even when accessed over HTTP (thanks to the configured `insecure-registries`).
![[Pasted image 20250705181417.png]]
Chapter 3: Build docker image out of node-js application and push it to our nexus docker repository
We have this simple node-js app running on port 3000 (locally) that we wanna push to our nexus docker repo
![[Pasted image 20250705182916.png]]
Step 1: Build docker image out of node-js app and tag it
We build a docker image out of our project and name it `my-app:1.0` for now
![[Pasted image 20250705183024.png]]
Then we re-tag it using the command:
`docker tag my-app:1.0 165.22.73.173:8083/my-app:1.0`
Where: - 165.22.73.173 is the ip address of our Digital Ocean droplet - 8083 is the port that accepts http push/pull requests as we configured it previously - my-app is the name of the docker image we created on the previous step - 1.0 is the version of our app
![[Pasted image 20250705183452.png]]
Step 2: Run push command to push our nodejs app image to the nexus docker repository
We push our created tagged image using the command :
`docker push 165.22.73.173:8083/my-app:1.0`
![[Pasted image 20250705183623.png]]
When we navigate to the docker repository inside Nexus, we can view pushed docker image there:
![[Pasted image 20250705183827.png]]


