Ecommerce OpenFeign Microservices App
Back to projects
I recently built a microservices-based e-commerce application using Spring Boot, and I wanted to share my journey with you. This project taught me a lot about distributed systems, inter-service communication, and containerization. Let me walk you through what I did!
Technologies
1. Setting Up Databases in Docker Compose
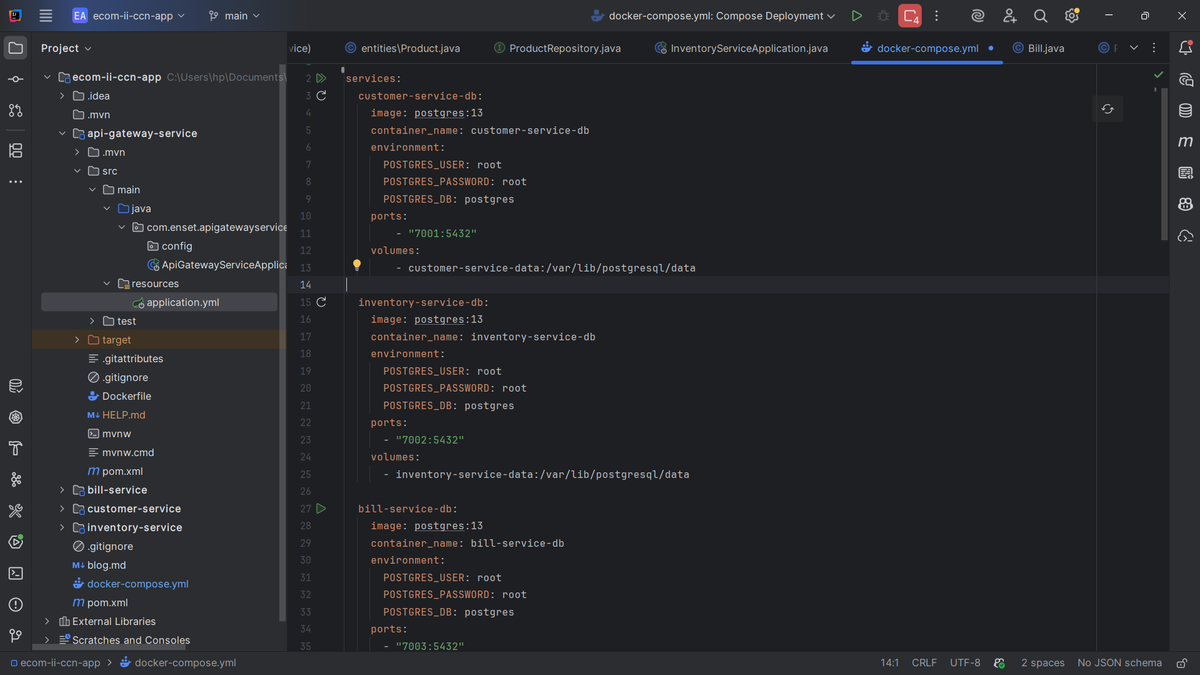
The first thing I did was set up the database infrastructure. I needed separate PostgreSQL databases for each of my microservices to maintain proper data isolation. In my docker.compose.yml, I configured three PostgreSQL 13 containers.
I created `customer-service-db` running on port 7001, `inventory-service-db` on port 7002, and `bill-service-db` on port 7003. Each database has its own persistent volume to ensure data isn't lost when containers restart. I used simple credentials (root/root) since this is a development environment - I'd definitely change these in production! The beauty of this setup is that each service has complete database independence, which is a core principle of microservices architecture.
2. Creating the Customer Service Microservice
Next up was building the customer service. This microservice manages all customer-related operations. Let me break down the key components I created.
Dependencies
I included Spring Boot Starter Data JPA for database operations, Spring Data REST to auto-generate RESTful endpoints, Spring Boot Actuator for health checks, PostgreSQL driver for database connectivity, and Lombok to reduce boilerplate code. These dependencies gave me everything I needed for a fully functional REST API with minimal coding.
Customer Entity
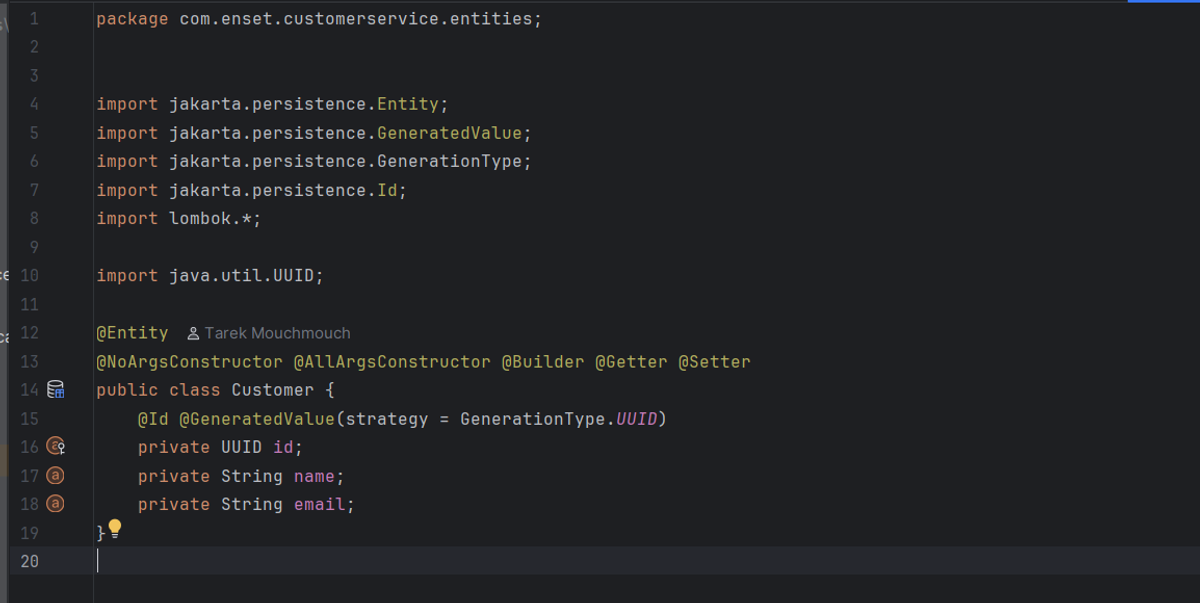
I created a simple `Customer` entity with UUID as the primary key (auto-generated), plus name and email fields. I used Lombok annotations like `@Getter`, `@Setter`, `@NoArgsConstructor`, `@AllArgsConstructor`, and `@Builder` to keep the code clean. The UUID strategy ensures globally unique identifiers across distributed systems.
Customer Projection
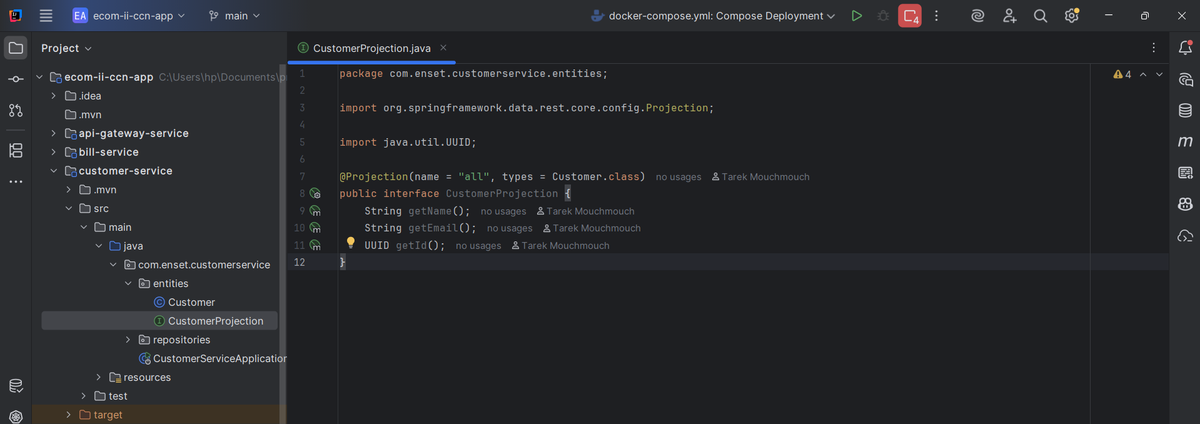
I defined a Spring Data REST projection interface called `CustomerProjection` to customize the JSON response format. This lets me control exactly what fields get exposed in my API responses without modifying the entity itself. It's a clean way to handle different views of the same data.
Customer Repository
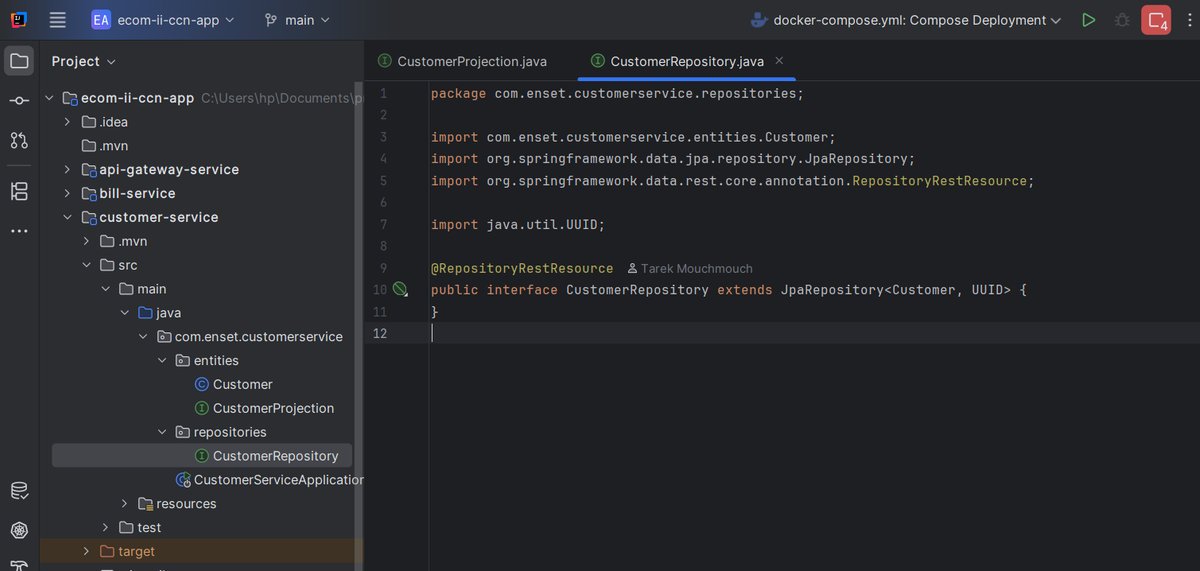
I created `CustomerRepository` extending `JpaRepository<Customer, UUID>` and annotated it with `@RepositoryRestResource`. This single interface automatically provides me with CRUD operations and RESTful endpoints at `/customers` - no controller code needed! Spring Data REST handles everything from GET, POST, PUT to DELETE operations.
3. Creating the Inventory Service Microservice
The inventory service manages all product information. It follows a very similar structure to the customer service, which made development faster.
Dependencies
I used the same core dependencies as customer service: Spring Data JPA, Spring Data REST, Spring Boot Actuator, PostgreSQL driver, and Lombok. This consistency across services makes the architecture easier to maintain and understand.
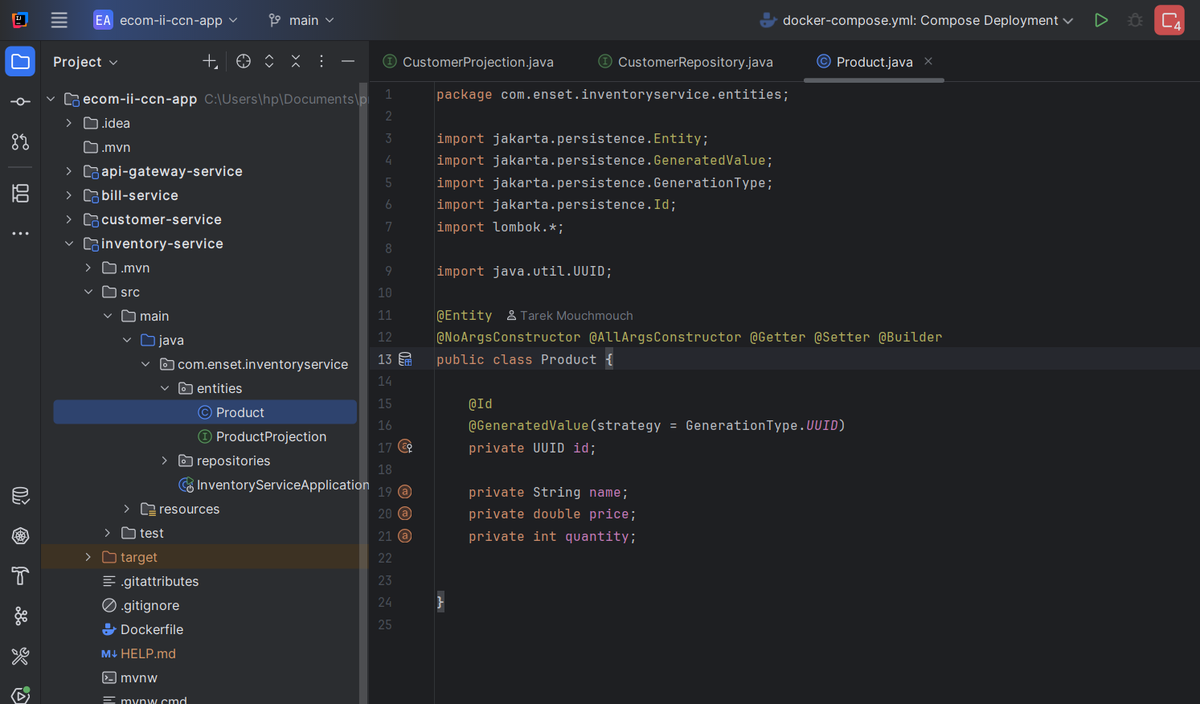
Product Entity
My `Product` entity has a UUID primary key, name, price (double), and quantity (int) fields. Again, I leveraged Lombok annotations to minimize boilerplate. The price and quantity fields let me track both product details and stock levels in one place.
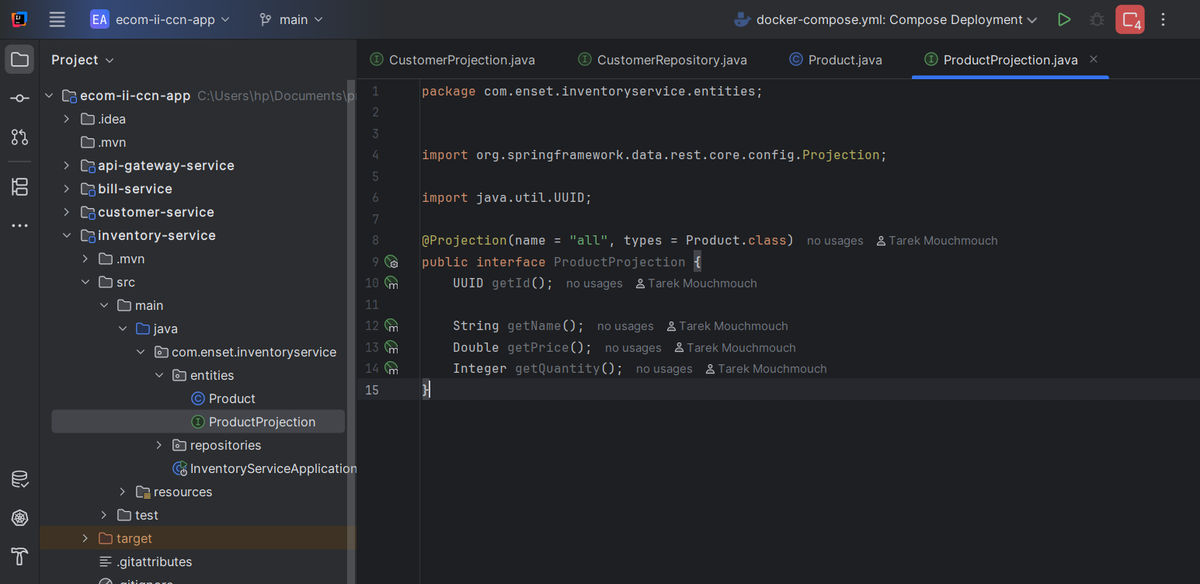
Product Projection
Similar to customer service, I created `ProductProjection` to control the API response structure. It exposes id, name, price, and quantity fields. This projection is especially useful when I need to fetch product data from other services.
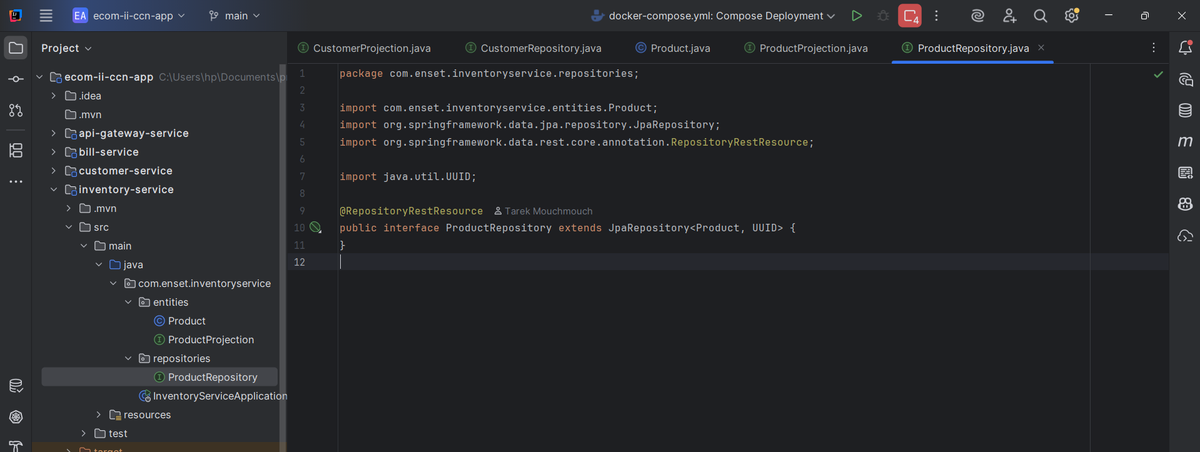
Product Repository
The `ProductRepository` interface extends `JpaRepository<Product, UUID>` and uses `@RepositoryRestResource` annotation. Just like that, I have a fully functional REST API at `/products` with zero custom controller code. Spring Data REST is incredibly powerful!
4. Creating the Bill Service Microservice
This was the most interesting service to build because it needed to communicate with both the customer and inventory services. This is where I implemented inter-service communication using Feign clients.
Dependencies
In addition to the standard dependencies, I added Spring Cloud OpenFeign for declarative REST client creation, and Spring HATEOAS for hypermedia-driven REST APIs. The Feign client makes calling other microservices as simple as calling a method - no manual HTTP client code needed!
Entities Folder
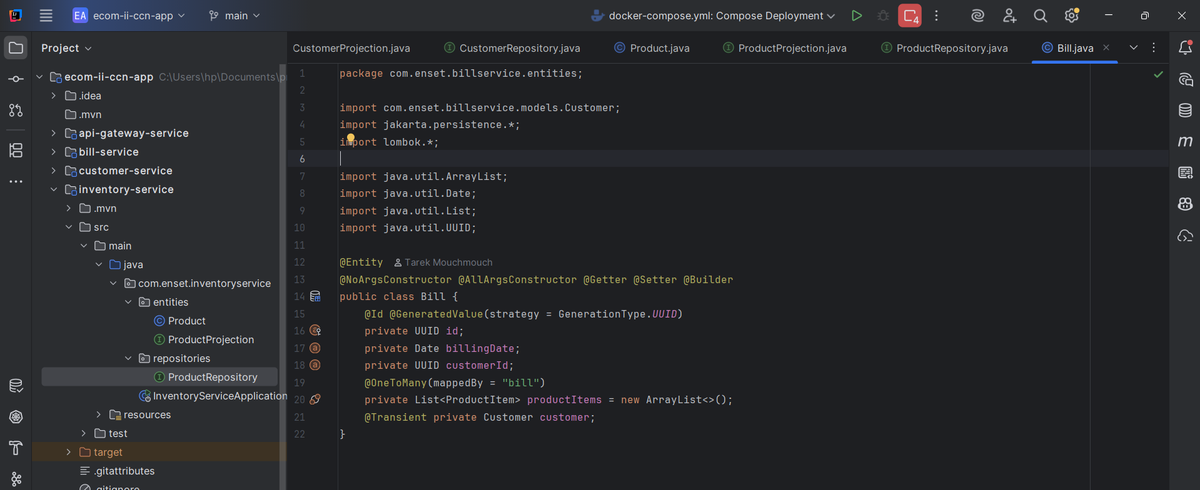
Bill Entity
My `Bill` entity contains an id, billingDate, customerId (UUID), and a one-to-many relationship with `ProductItem`. I also added a transient `Customer` field (not persisted) that gets populated when I fetch customer details from the customer service. This separation keeps the database normalized while still allowing rich object relationships.
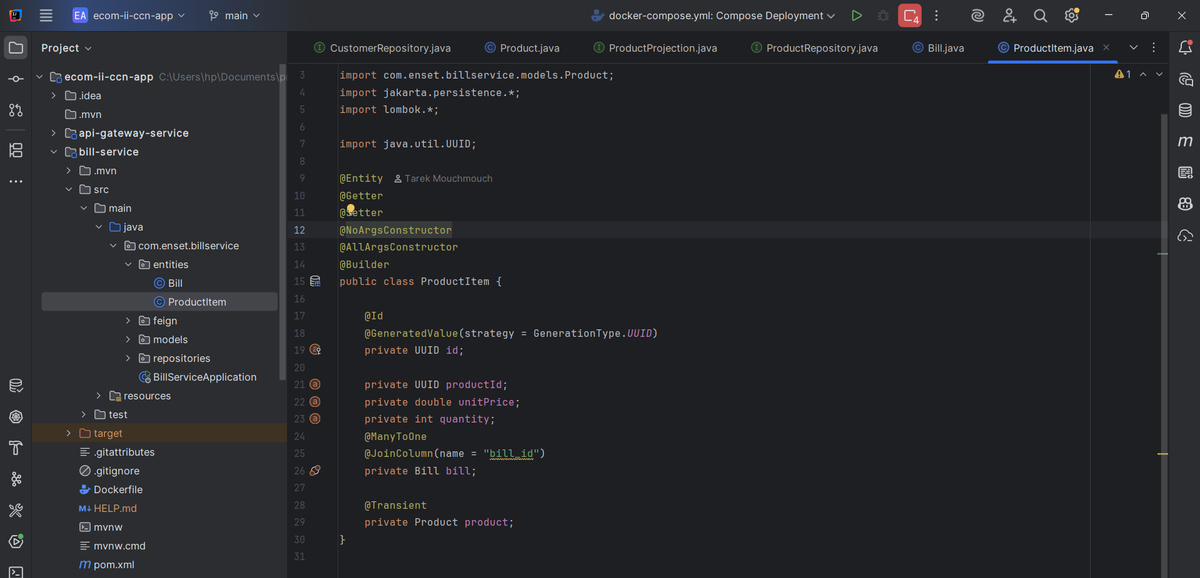
ProductItem Entity
`ProductItem` represents individual line items in a bill. It has productId (UUID), unitPrice, quantity, a many-to-one relationship with `Bill`, and a transient `Product` field. Each item links back to its bill and stores price/quantity at the time of purchase - crucial for historical accuracy even if product prices change later.
Feign Folder (REST Clients)
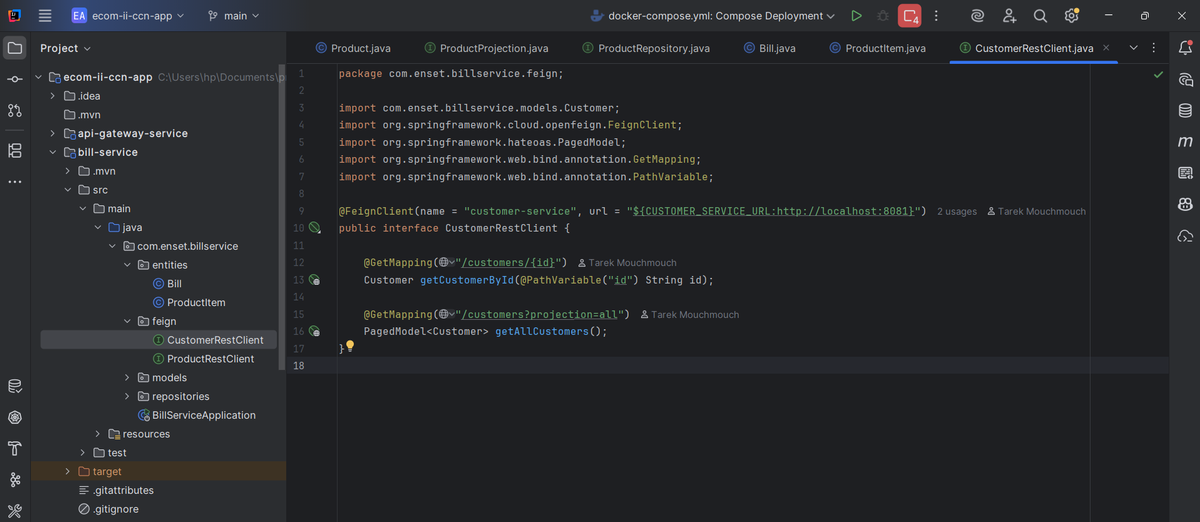
CustomerRestClient
I created a Feign client interface annotated with `@FeignClient(name = "customer-service")` that defines methods to fetch customer data. The `getCustomerById()` and `getAllCustomers()` methods let me call the customer service as if it's a local method. I used environment variables for the URL to make it flexible across different environments.
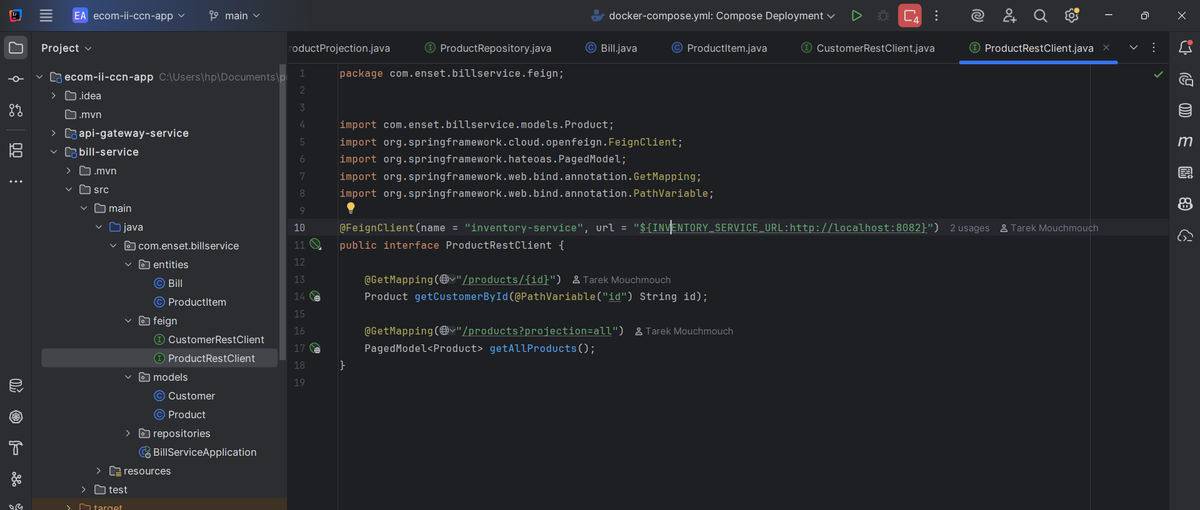
ProductRestClient
Similarly, `ProductRestClient` is a Feign interface for calling the inventory service. It provides methods like `getProductById()` and `getAllProducts()`. The beauty of Feign is that it handles all the HTTP communication, JSON serialization/deserialization, and error handling automatically.
Models Folder
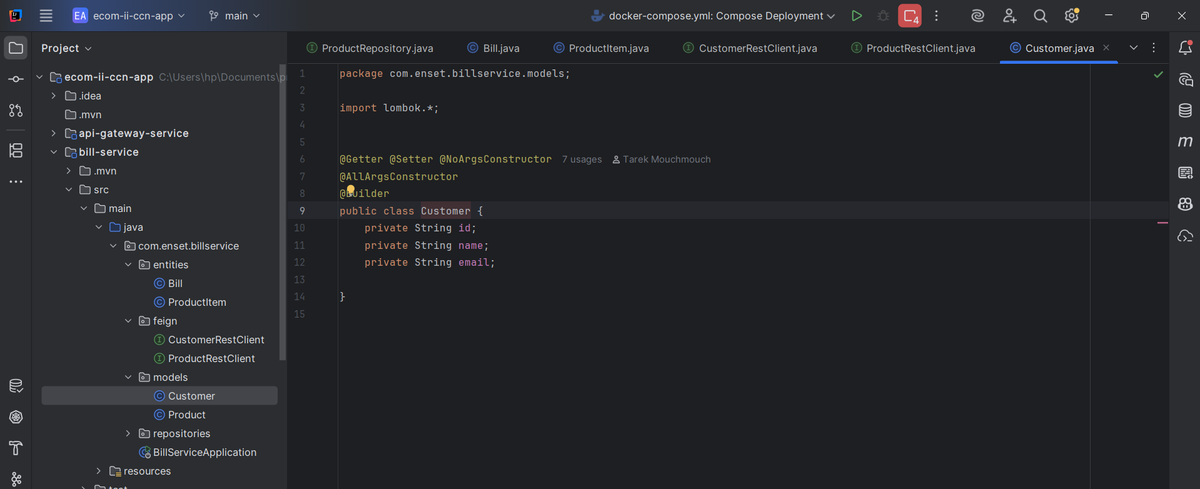
Customer Model
I created a simple POJO called `Customer` with id, name, and email fields. This mirrors the structure from customer-service but exists independently in bill-service. It's used to deserialize responses from the customer service Feign client.
Product Model
Similarly, the `Product` model mirrors the inventory-service product structure. Having these models in bill-service allows me to work with customer and product data without direct database dependencies - true microservice isolation!

Repositories Folder
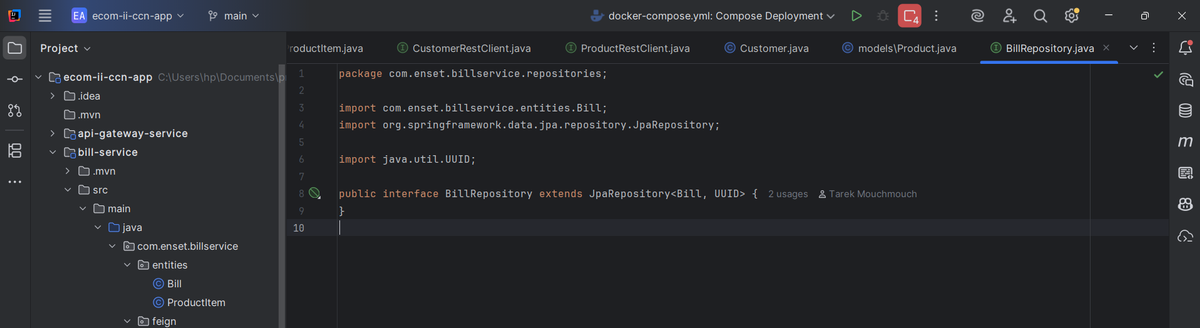
BillRepository
A standard `JpaRepository<Bill, UUID>` interface for CRUD operations on bills. Nice and simple!
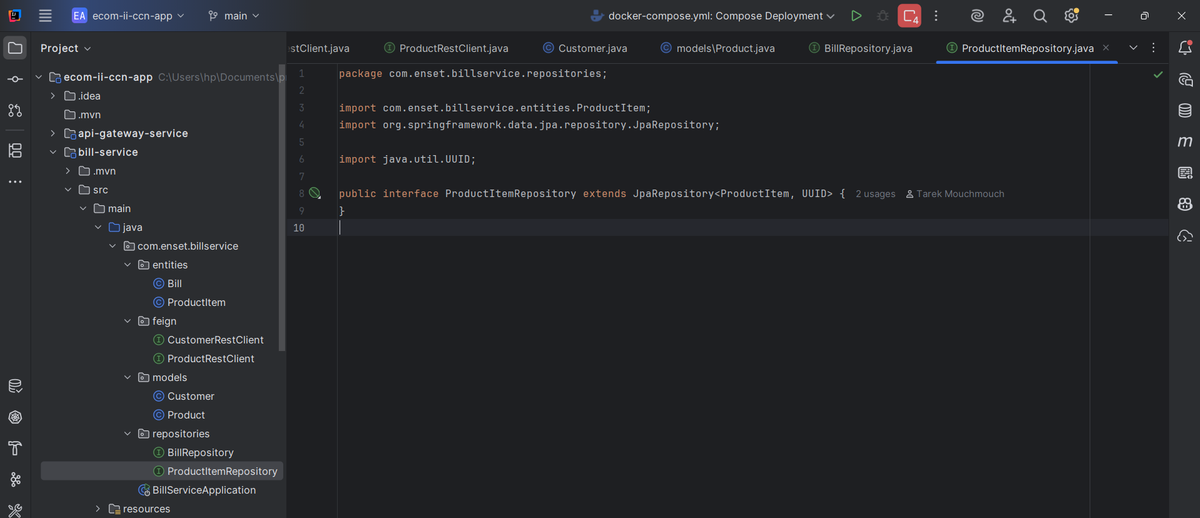
ProductItemRepository
A standard `JpaRepository<ProductItem, UUID>` for managing product items within bills.
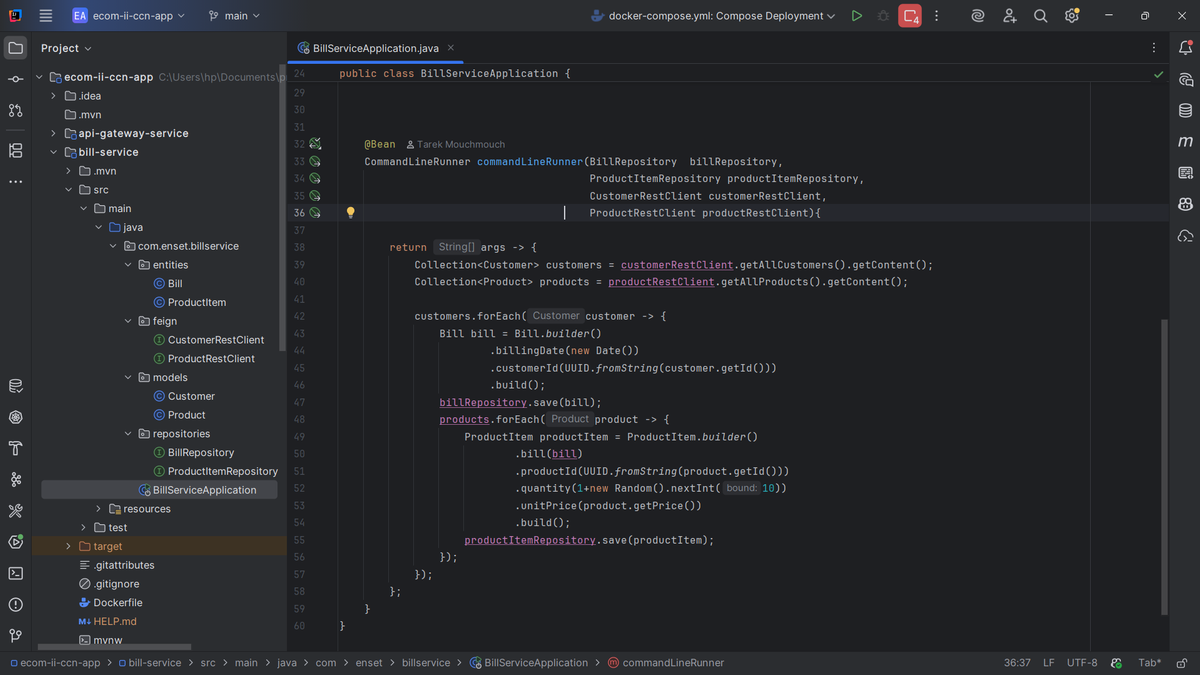
CommandLineRunner in BillServiceApplication
I implemented a `CommandLineRunner` bean that initializes test data when the application starts. It fetches all customers from customer-service and all products from inventory-service using the Feign clients. Then for each customer, it creates a bill with random quantities of all products. This demonstrates the inter-service communication perfectly and gives me sample data to work with. The beauty of this approach is that I'm pulling live data from other services rather than hard-coding test data.
5. Creating the API Gateway Microservice
The API gateway is the single entry point for all client requests. Instead of clients calling multiple services directly, they go through the gateway which routes requests to the appropriate service.
Dependencies
I used Spring Cloud Gateway MVC as the main dependency. This provides all the routing, filtering, and load balancing capabilities I need. I also included Spring Boot Actuator for monitoring the gateway's health.
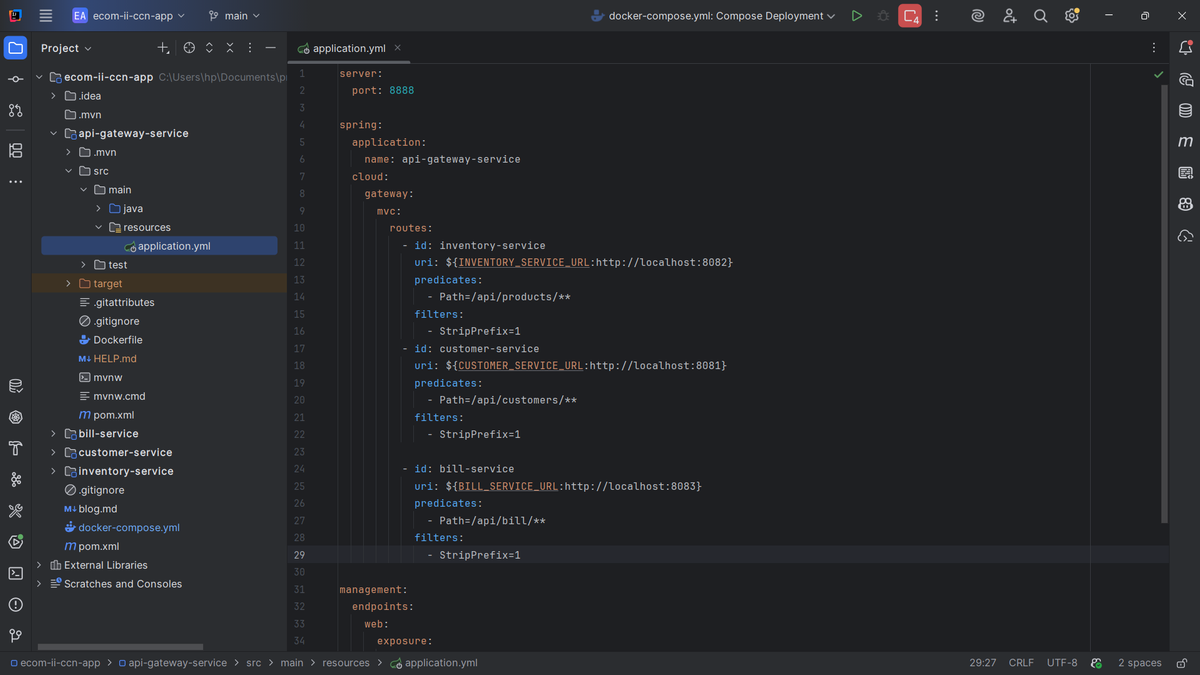
Gateway Configuration
In my `application.yml`, I configured the gateway to run on port 8888. I defined three routes: one for inventory-service (`/api/products/**`), one for customer-service (`/api/customers/**`), and one for bill-service (`/api/bill/**`). Each route uses a path predicate and a `StripPrefix` filter to remove the `/api` prefix before forwarding to the backend service. I used environment variables for service URLs so they work both locally and in Docker. This centralized routing makes the system much easier to manage and provides a clean API structure for clients.
6. Dockerizing the Microservices
The final step was containerizing everything so the entire system can run consistently across any environment.
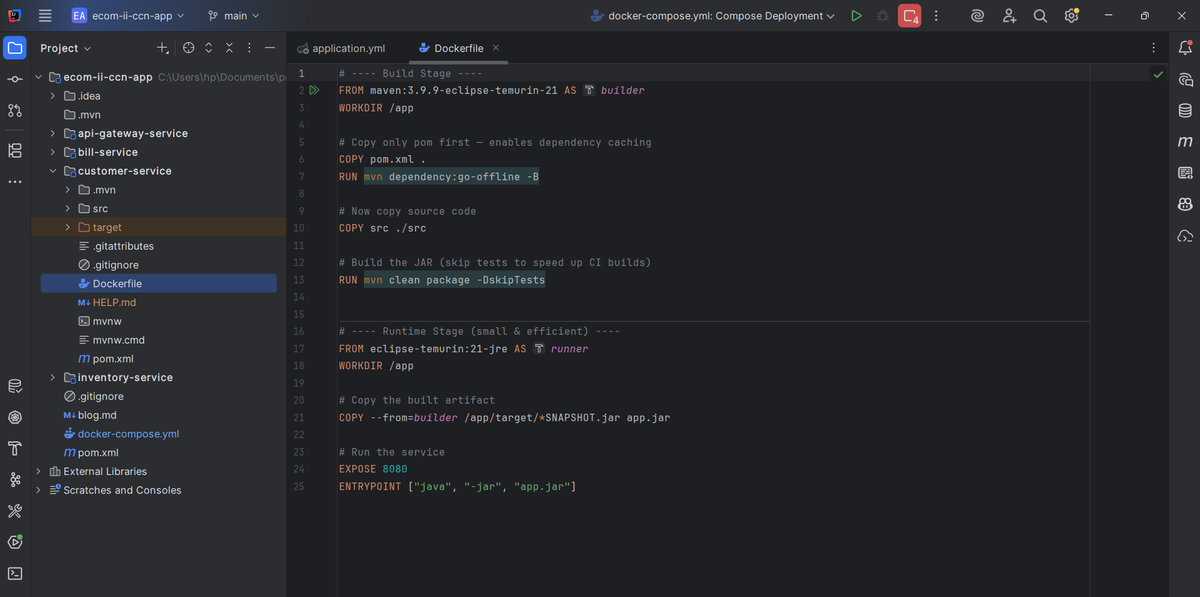
Dockerfile Template
I created a multi-stage Dockerfile that I reused across all microservices. The first stage uses `maven:3.9.9-eclipse-temurin-21` to build the application. I copy the pom.xml first and run `mvn dependency:go-offline` to cache dependencies - this makes subsequent builds much faster. Then I copy the source code and run `mvn clean package -DskipTests`. The second stage uses `eclipse-temurin:21-jre` (a lightweight JRE image) and copies only the built JAR file. This results in much smaller production images since we don't need Maven or source code at runtime.
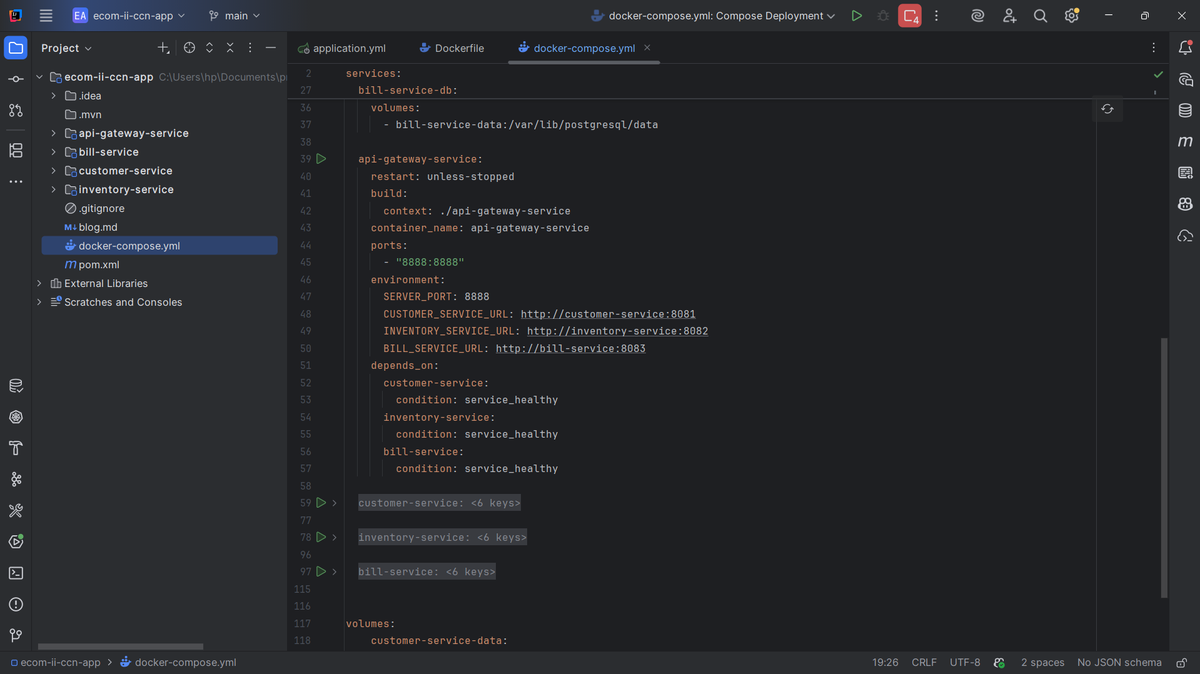
Docker Compose Integration
I added all four microservices to my docker-compose file. Each service has a `build` context pointing to its directory, environment variables for configuration, and proper `depends_on` settings to ensure databases start first. The API gateway depends on all three backend services and won't start until they're healthy. I implemented health checks using Spring Actuator's `/actuator/health` endpoint with curl commands. This ensures services are fully ready before the gateway tries to route traffic to them. Port mapping exposes the gateway on 8888, making it the only port clients need to know about.
Wrapping Up
Building this microservices architecture taught me so much about distributed systems! The key takeaways for me were: keeping services loosely coupled with separate databases, using Feign for clean inter-service communication, implementing proper health checks for orchestration, and containerizing everything for consistent deployments. The architecture is scalable - I can easily add more services or scale existing ones independently. The API gateway provides a clean facade and can handle cross-cutting concerns like authentication and rate limiting in the future. I hope this walkthrough helps you understand microservices architecture better. Feel free to reach out if you have questions or suggestions!