Provision AWS EC2 using Terraform
Back to projects
This project demonstrates how to provision a complete AWS environment using Terraform. It includes setting up a VPC with subnets, configuring networking and security, and deploying an EC2 instance running Docker with a sample Nginx application. The goal is to show a fully automated, reproducible infrastructure setup in the cloud.
Technologies
Chapter 1: Initial Setup
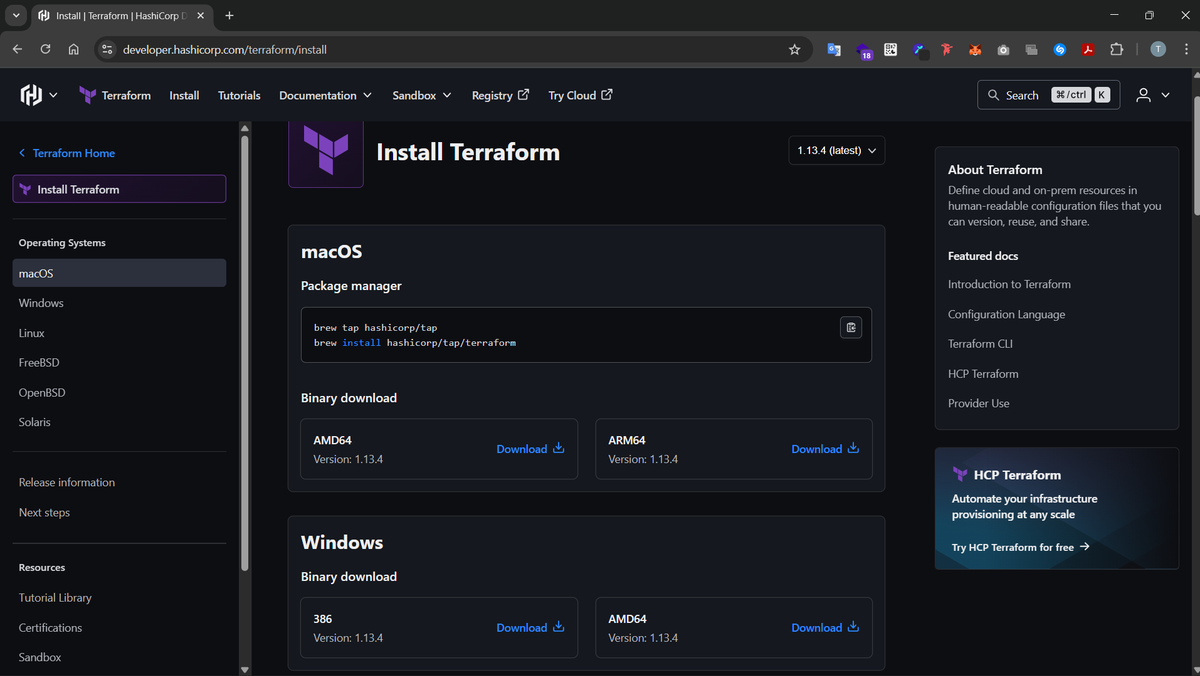
Firstly we need to download Terraform and add it to our path variables so we can use it in the terminal, So we download terraform:
Then in order for us to use terraform for provisioning our AWS infastructure. We will need two files mainly
- main.tf : Which will contain all the definitions of our AWS ressources that we will need (VPC, Subnets, Security Groups, EC2 Instances etc...)
- terraform.tfvars : which contains env variables that will be injected inside our terraform configuration. We won't push this file to Git/Github
The first thing in our main.tf file is:
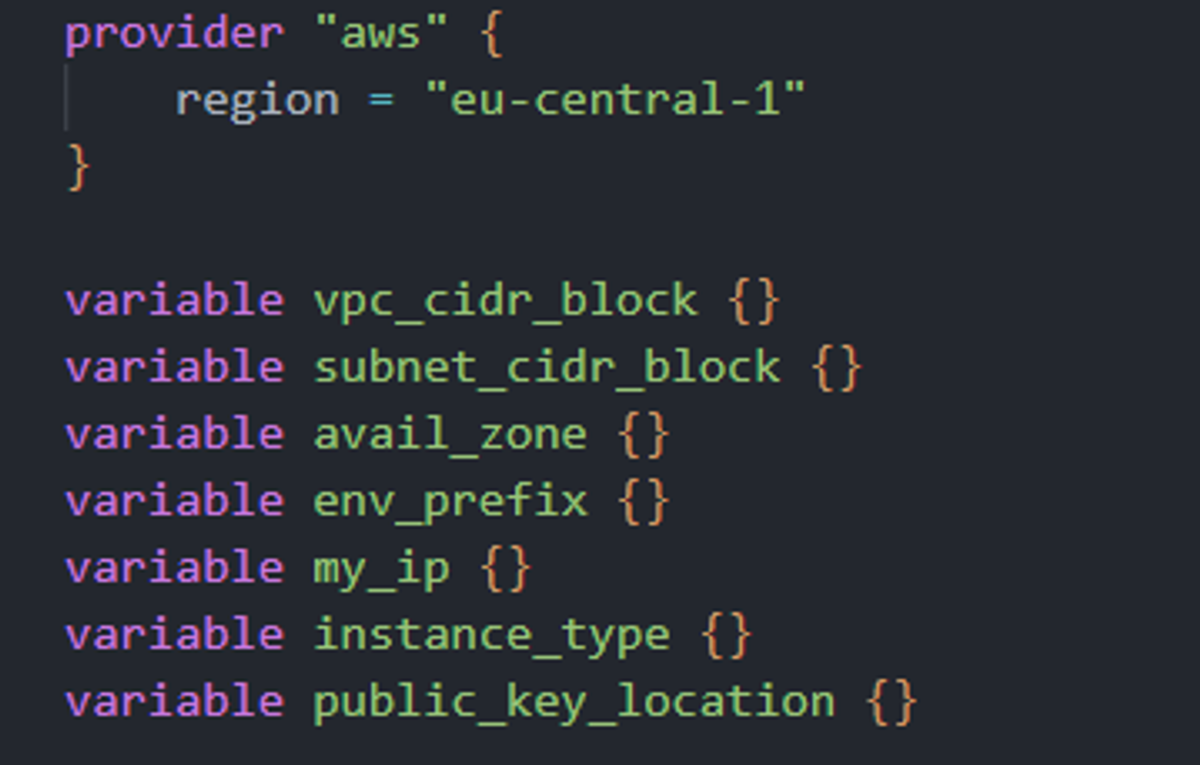
We'll explain the use of the different variables defined there... let's keep going.
Chapter 2: Provisioning our VPC and Subnet
Step 1: VPC
Before deploying AWS resources like EC2 instances or databases (we'll only deploy EC2 in our case), we need a secure network environment for them — that’s the VPC (Virtual Private Cloud).
A VPC is our own isolated network in AWS, similar to a private data center. It lets us control:
- IP address ranges (CIDR blocks)
- Subnets (smaller networks inside the VPC)
- Routing rules (how traffic flows)
- Security (through security groups and ACLs)
All our AWS resources live inside a VPC — it defines where they run and how they communicate.
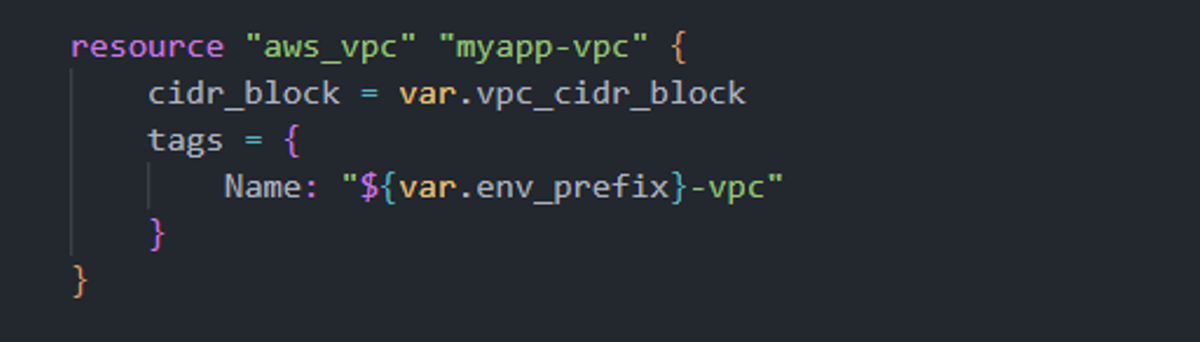
Let’s break this down:
- aws_vpc → Tells Terraform that we want to create a new AWS VPC resource.
- cidr_block → Defines the IP address range for the VPC. In our case, it’s set via a variable (10.0.0.0/16) which gives us around 65,000 private IP addresses to use for our subnets and instances.
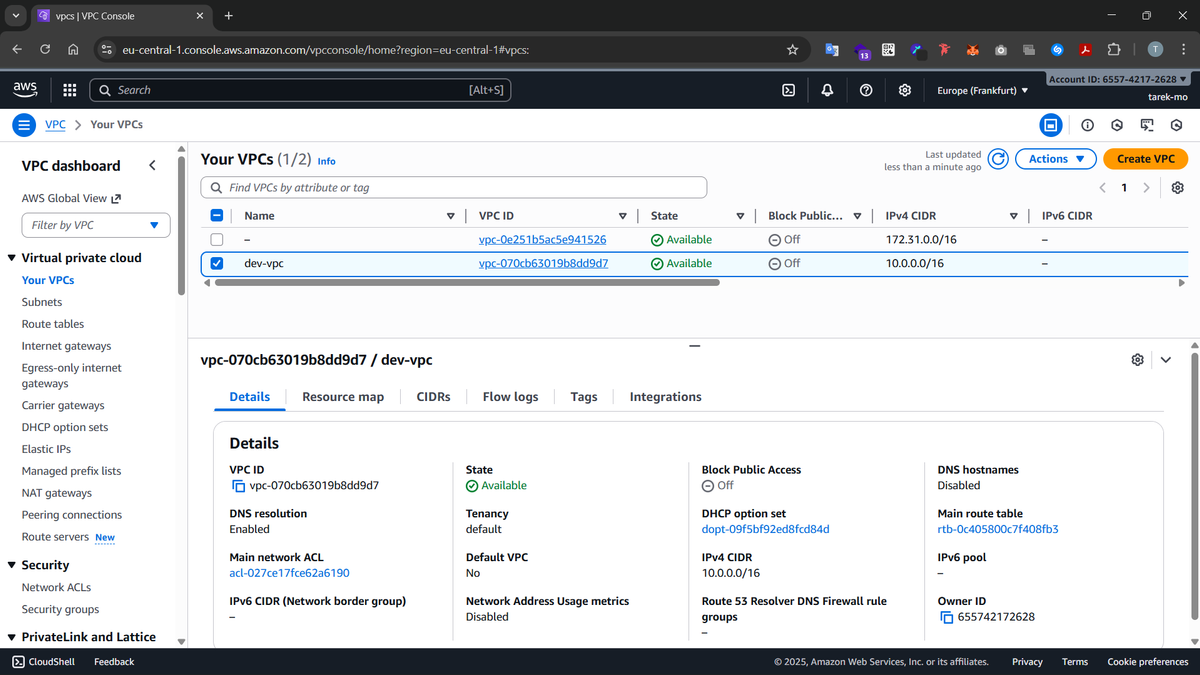
- tags → Adds a friendly name to the VPC (dev-vpc) for easier identification in the AWS console.
This VPC will act as the foundation of our network infrastructure. All other resources — like subnets, internet gateways, route tables, and EC2 instances — will be created inside this VPC.
After VPC creation, it will look like this in the AWS dashboard:
Step 2: Subnet
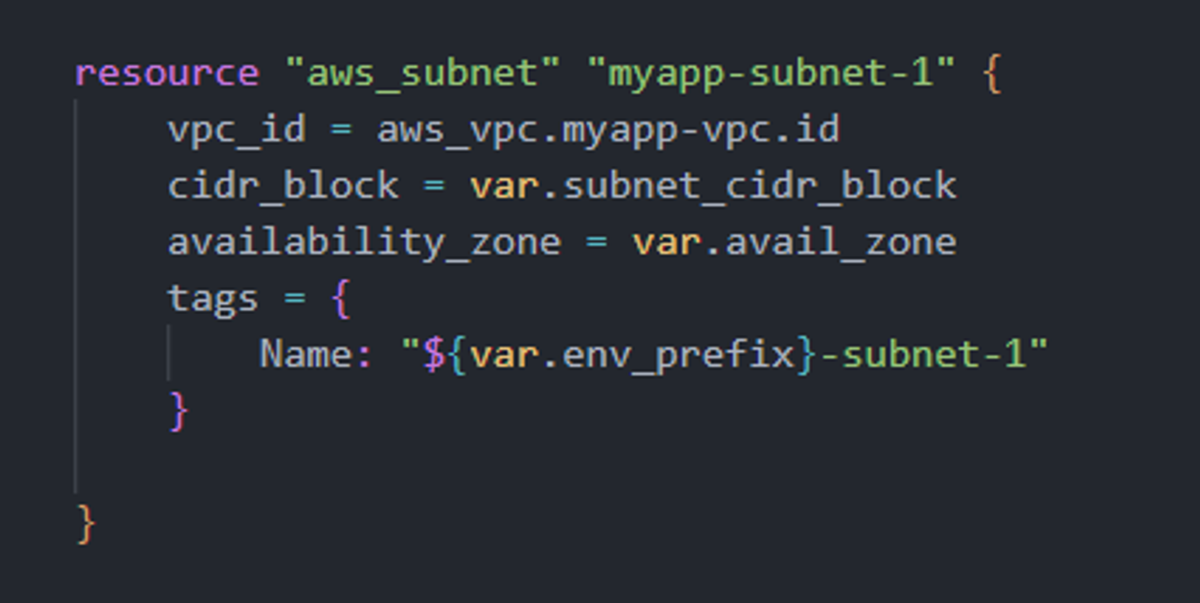
A subnet is a smaller network segment inside our VPC — it’s where our EC2 instances and other resources actually live. We don’t launch instances directly in a VPC because subnets help organize resources by function, security level, or availability zone (for example: one subnet for public web servers, another for private databases).
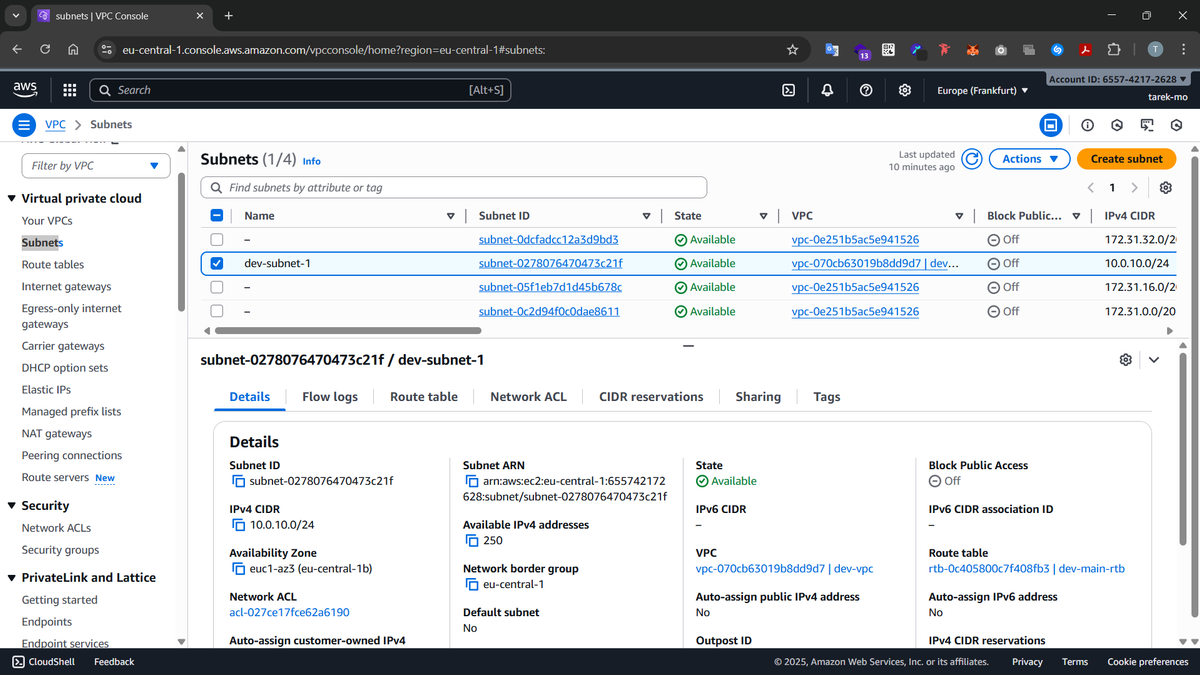
In our code, we create a subnet within the VPC, assign it a CIDR block (10.0.10.0/24), and place it in a specific Availability Zone (eu-central-1b). While AWS automatically creates default subnets in the default VPC of each region, defining our own gives us better control over IP ranges, zone placement, and tagging — making our infrastructure cleaner and more secure.
How our subnet will look like after applying this main.tf file:
Step 3: Internet Gateway
An Internet Gateway (IGW) connects our VPC to the outside world, allowing instances to access and be accessed from the internet. Without an IGW, all instances would remain isolated within the private VPC network.
In a default VPC, AWS attaches an IGW automatically, but for custom VPCs we need to create and attach one ourselves. This ensures our instances in the subnet can communicate with the internet in a controlled way.
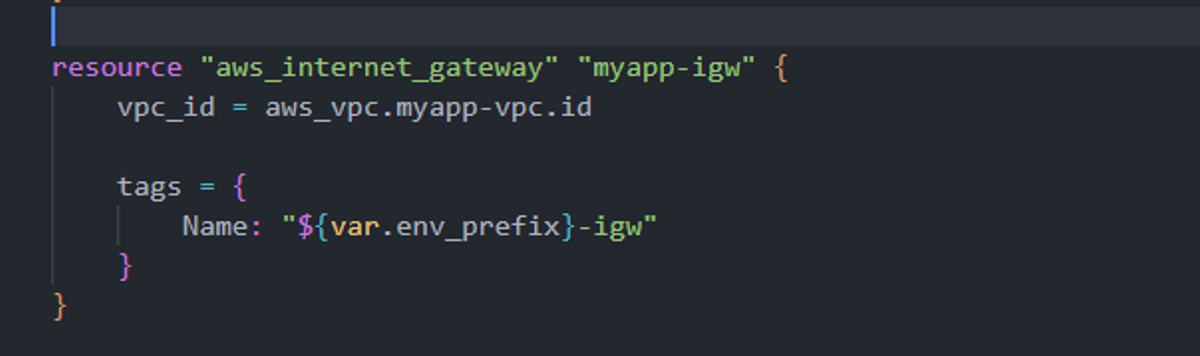
How it looks like in our AWS dashboard after creation:
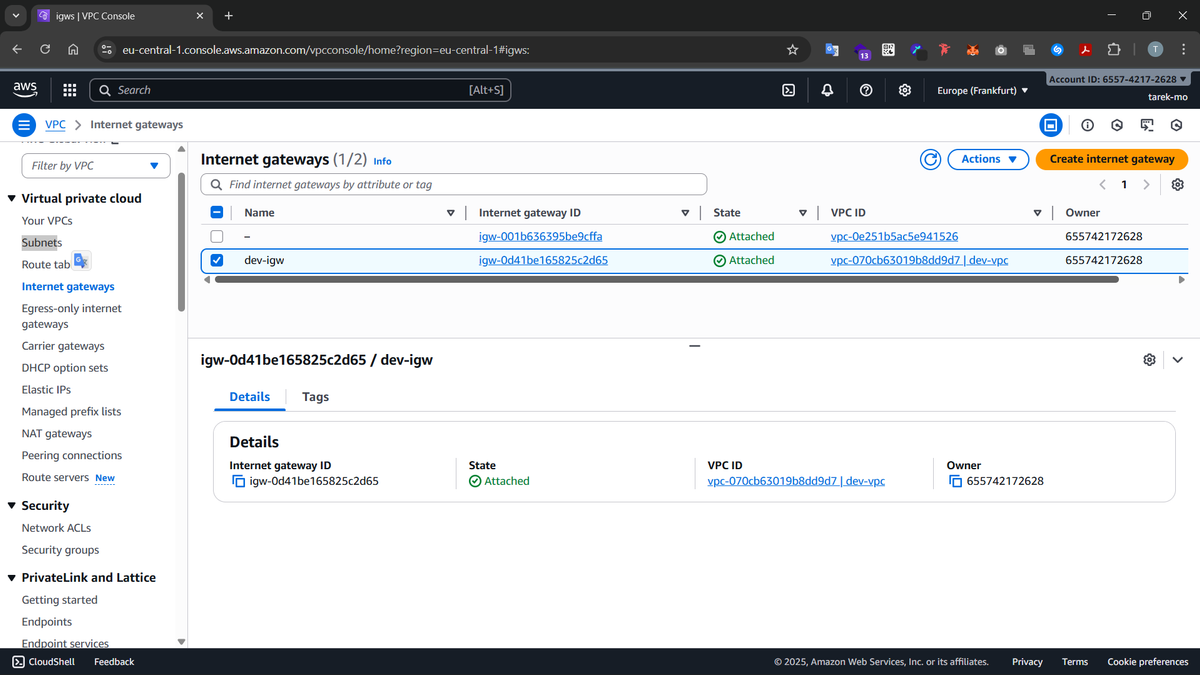
As you can see, it was attached to our custom VPC.
Step 4: Route Table
The route table controls how network traffic moves inside the VPC and to external destinations. Here, we add a route 0.0.0.0/0 pointing to the Internet Gateway, so any traffic leaving our VPC goes through the IGW.
Default VPCs come with a pre-configured main route table, but in our custom VPC, defining this route explicitly ensures predictable internet connectivity for our subnet. It also allows us to manage multiple subnets with different routing rules if needed.
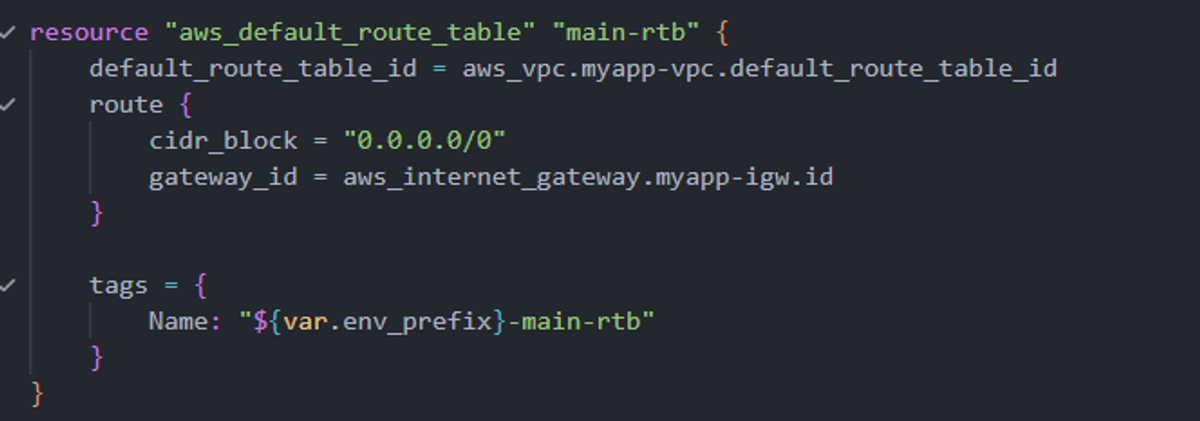
Visualizing our route table after creation:

Chapter 3: Provisioning our AWS EC2 instance
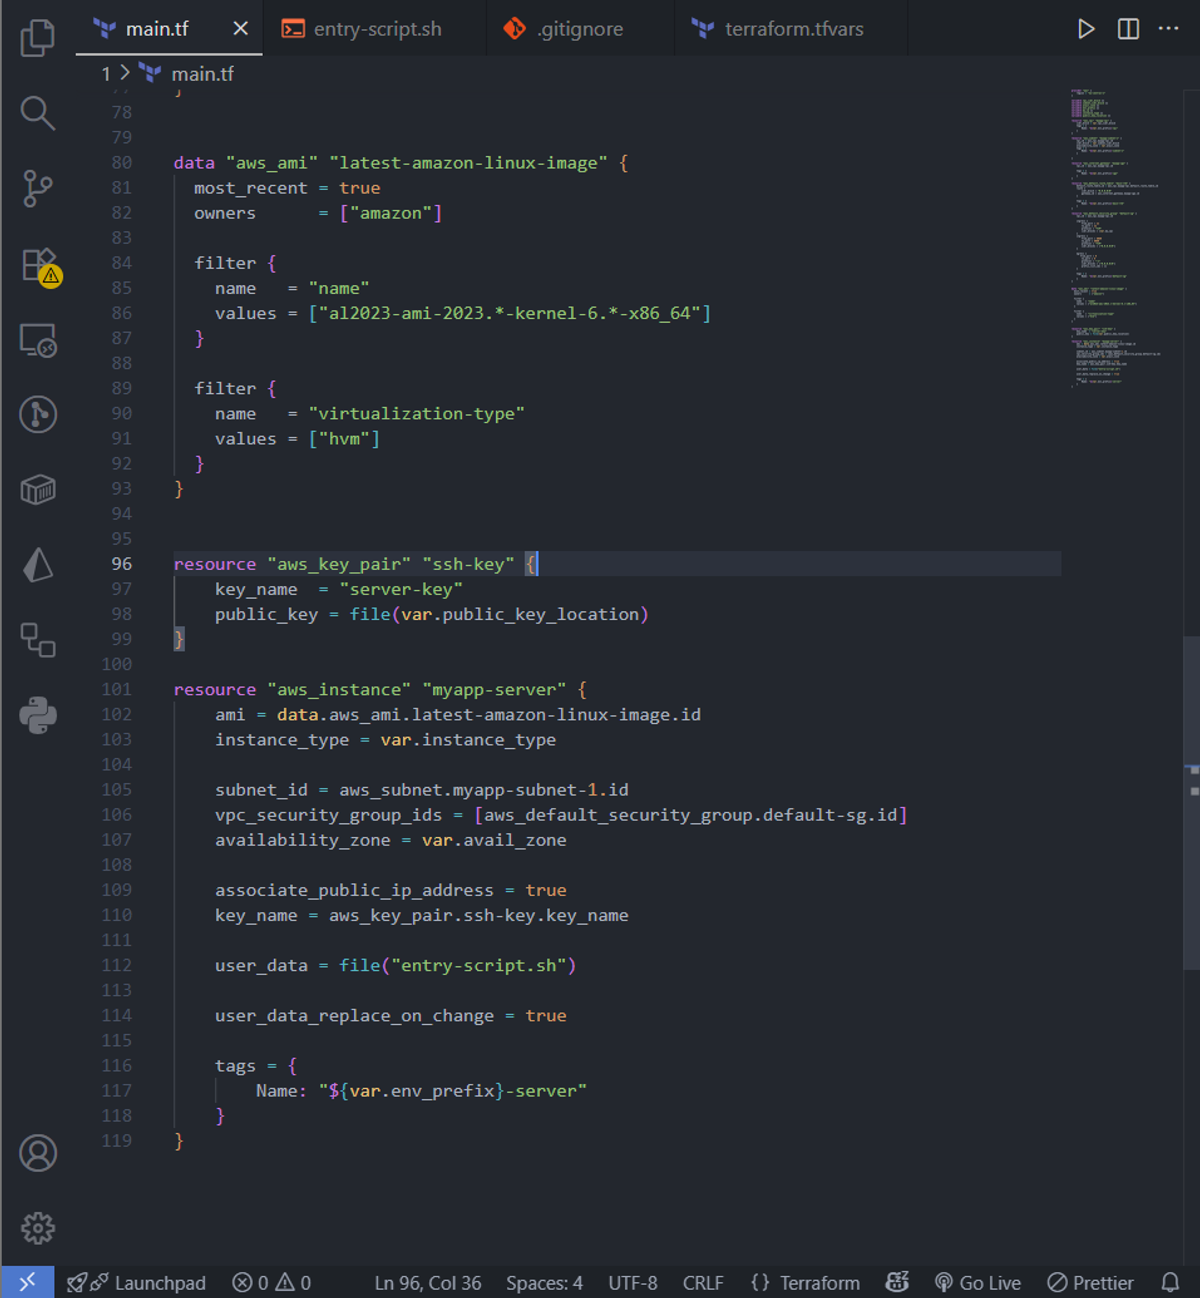
With the networking layer in place, it’s time to launch the compute resources that will run our application. Here, we define three key components: the AMI, the SSH key pair, and the EC2 instance itself.
The AMI (Amazon Machine Image) determines the operating system and base configuration of our instance. We use a data source to dynamically fetch the latest Amazon Linux 2023 AMI, filtered for the x86_64 architecture and HVM virtualization. This ensures that every time we deploy, we get a fresh, up-to-date OS optimized for AWS.
The SSH key pair is how we securely access our EC2 instance. By providing our public key, we can log in via SSH without using a password. Defining it in Terraform ensures the key is automatically associated with the instance during creation.
Finally, the EC2 instance resource ties everything together. We specify the AMI, instance type, subnet, and security groups. The user_data script automates post-launch setup: updating the system, installing Docker, starting the service, adding our user to the Docker group, and immediately running an Nginx container. With this approach, the instance is ready to serve traffic right after creation, without any manual intervention.
This single block of code handles everything from OS selection to application deployment, making our infrastructure reproducible and fully automated.
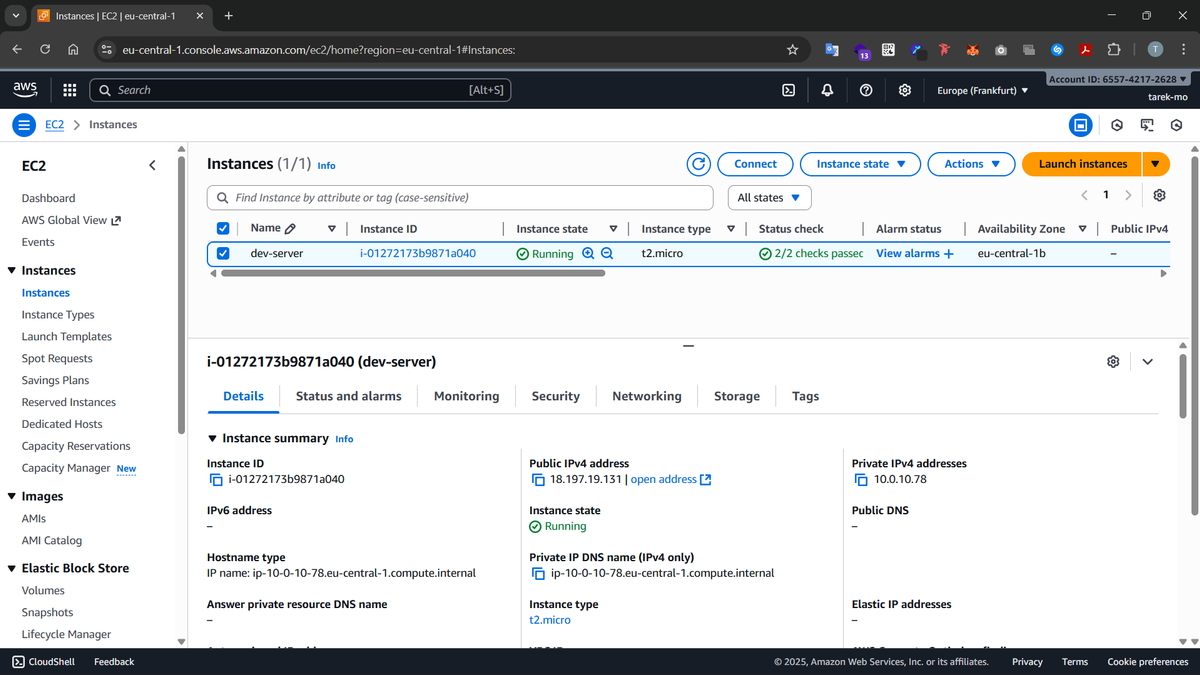
Our EC2 instance will look like this in the dashboard UI after creation:
Chapter 4: Securing Our Instance with a Security Group
After setting up networking and launching our EC2 instance, we need to control who can access it and what traffic it can send out. That’s where a Security Group comes in — essentially a virtual firewall for our instance.
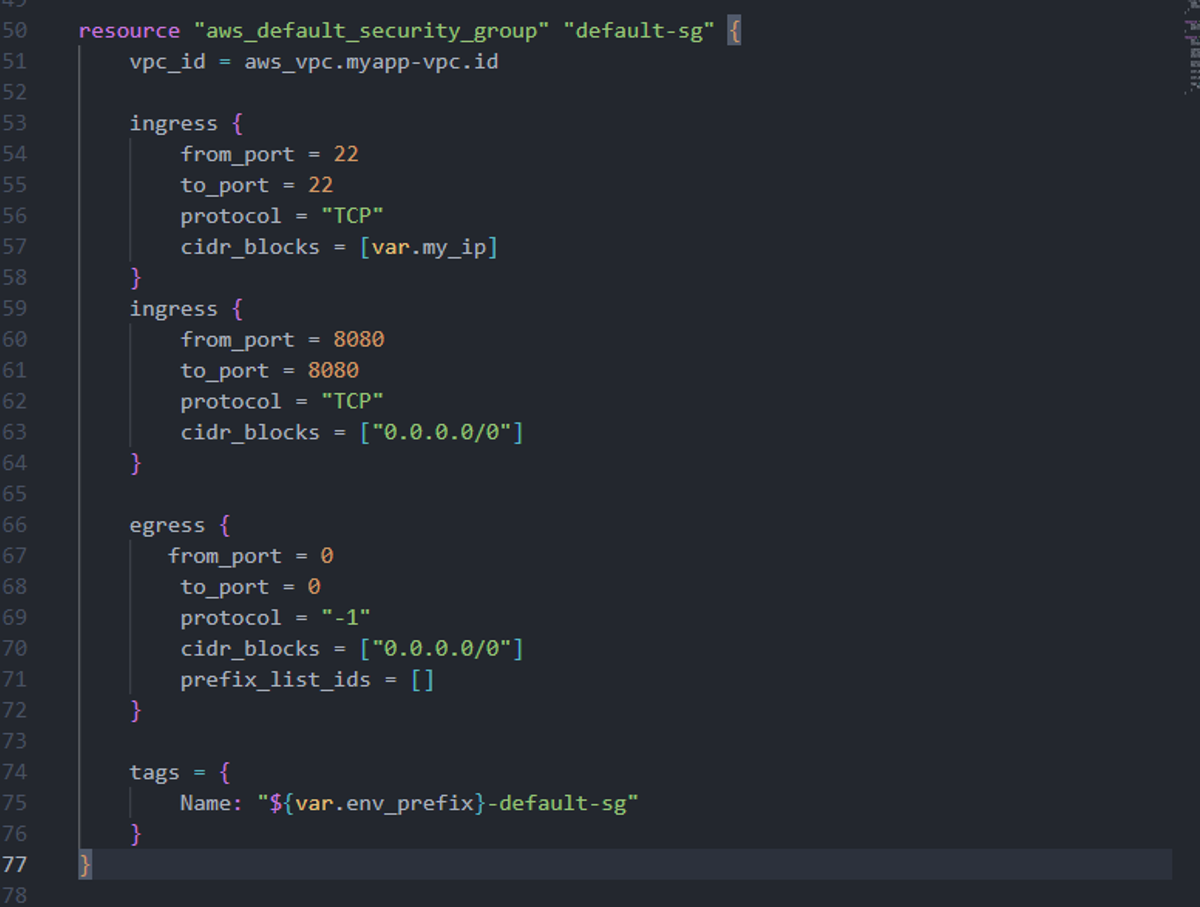
In our configuration, we define a default security group for the VPC. We allow two types of incoming traffic (ingress):
- SSH (port 22) restricted to our own IP (var.my_ip), so only we can log in to the instance.
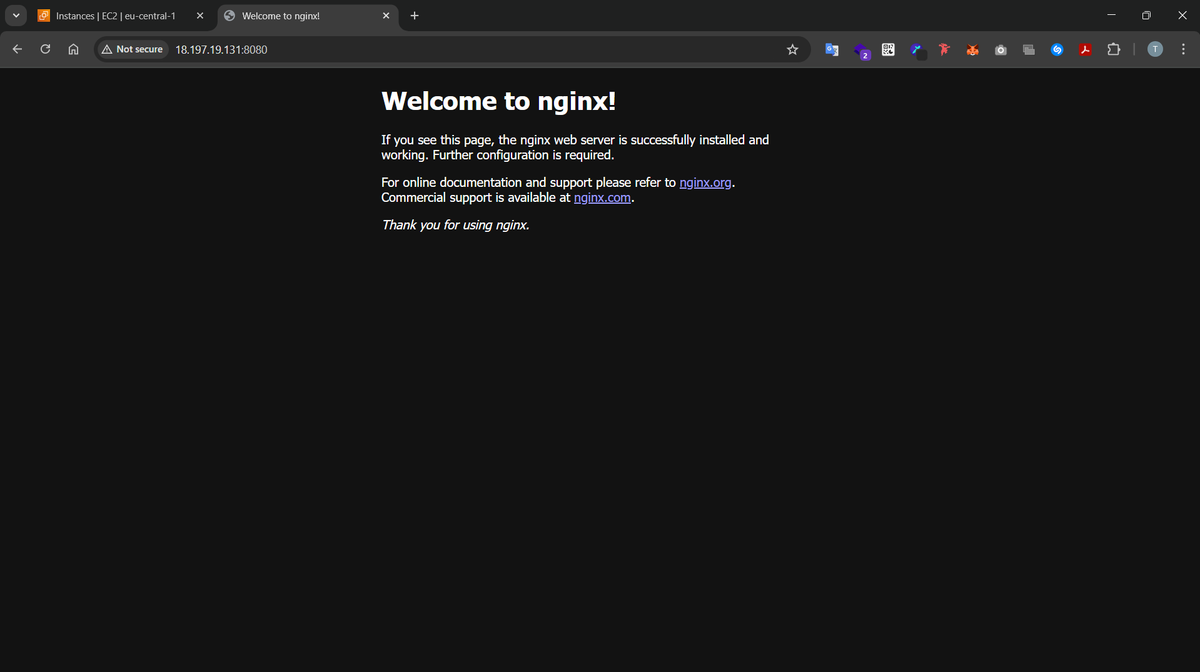
- HTTP (port 8080) open to the world (0.0.0.0/0), so our Nginx server can serve requests publicly.
For outgoing traffic (egress), we allow all destinations on all ports. This ensures the instance can download updates, communicate with other services, or fetch Docker images without restrictions.
Defining this security group ourselves gives us full control and avoids relying on AWS defaults, which might be too permissive or not tailored to our application needs. By explicitly managing it, we follow best practices for both accessibility and security.
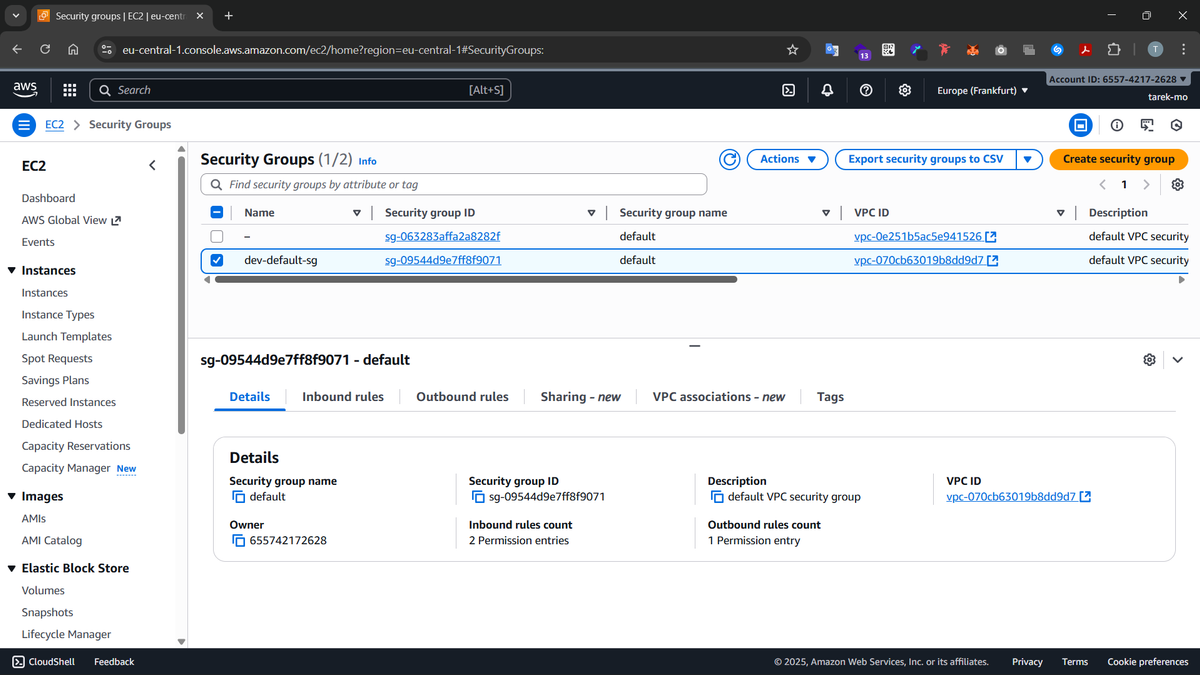
Our security group after creation:
Chapter 5: Applying the whole Terraform configuration to create all the ressources
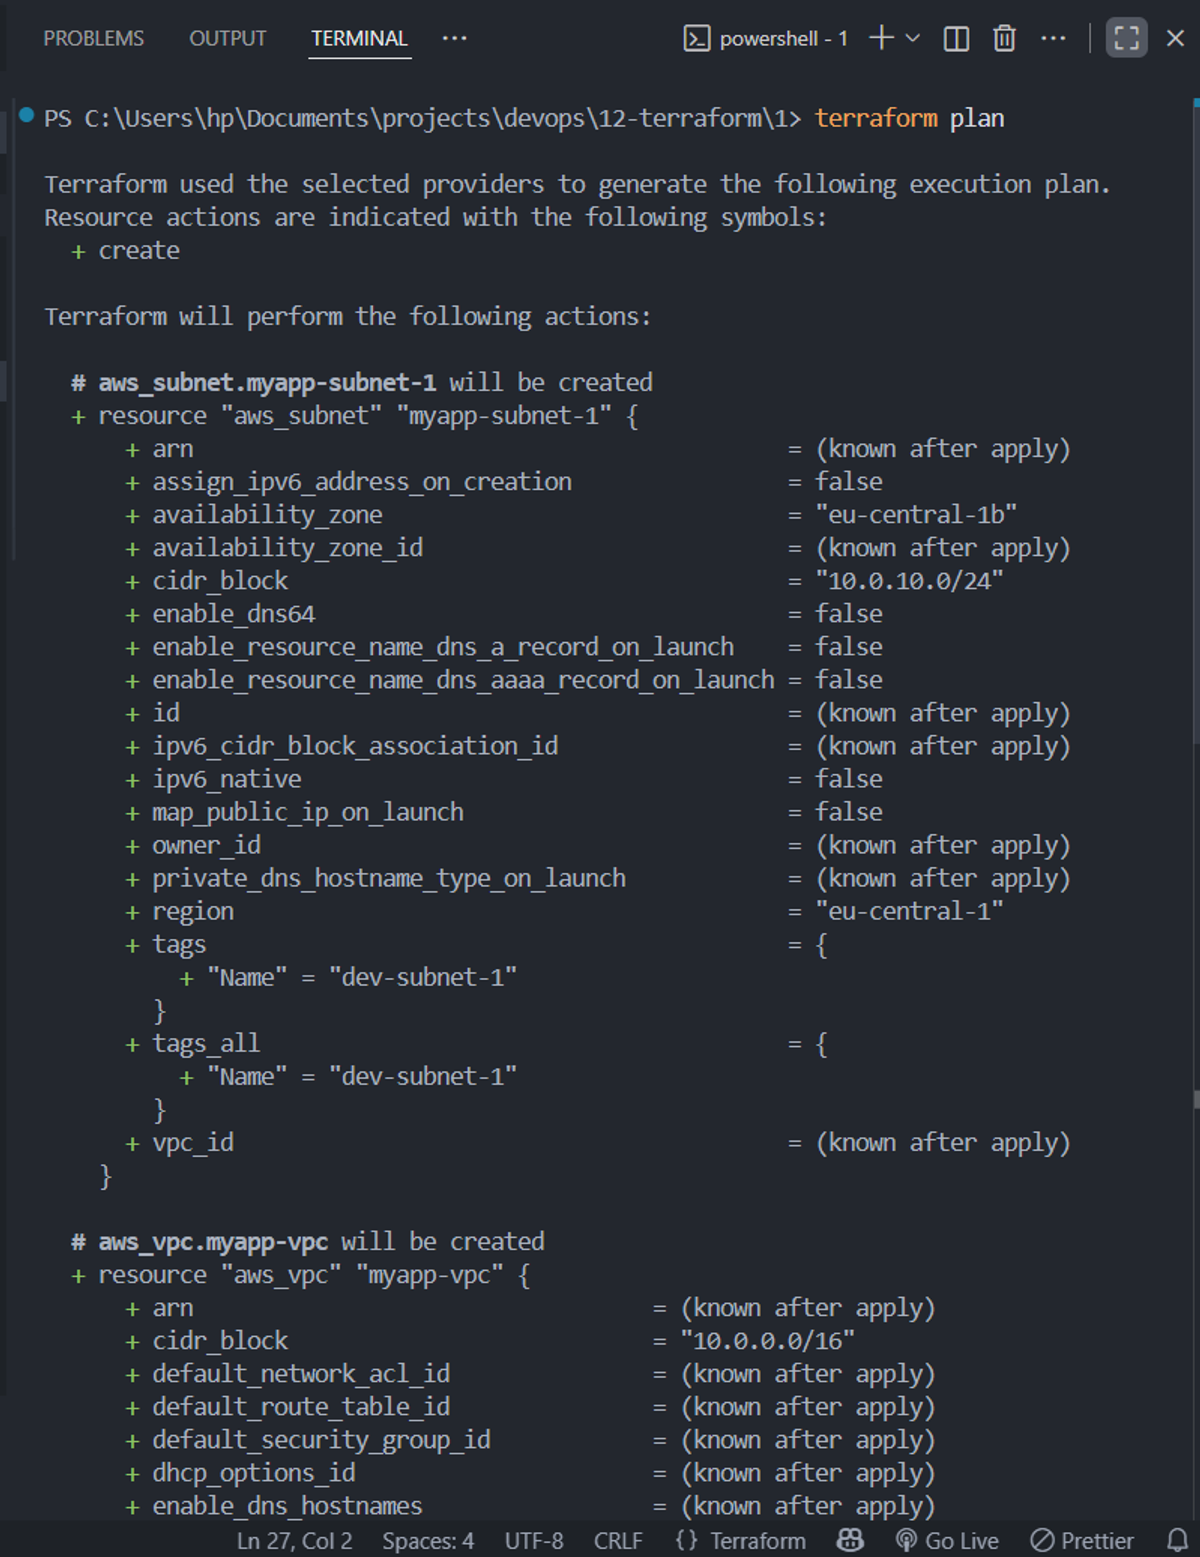
We first run the command terraform plan so we can safely review all the AWS ressources that'll be created before running terraform apply command to apply our changes.
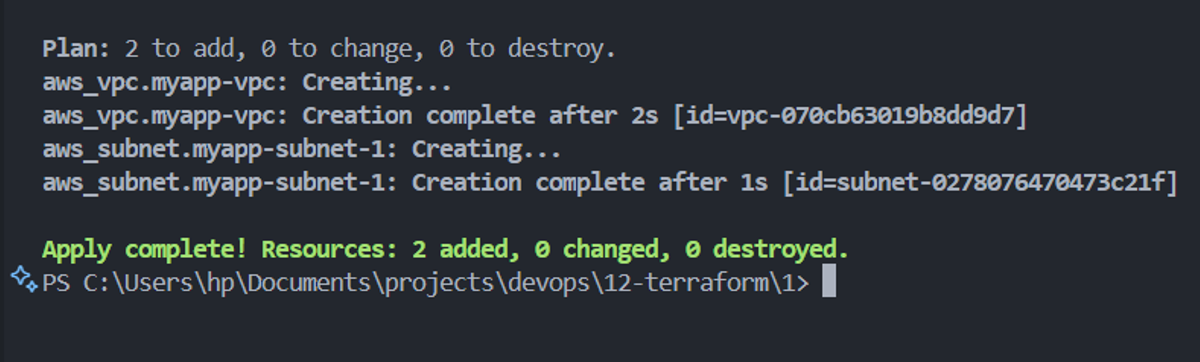
Then we run the command terraform apply --auto-approuve to apply our changes
Finally we can visit our EC2 instance that's running our Nginx server to verify that everything is working as expected: