Stateful MongoDB Deployment on Linode Kubernetes with Helm
Back to projects
This project demonstrates how to deploy a highly available MongoDB replica set with a web UI using Mongo Express, running on a managed Kubernetes cluster in Linode Kubernetes Engine (LKE). Traffic from the browser is routed through Nginx Ingress to the Mongo Express UI.
Technologies
1- Spinning Up the Kubernetes Cluster on Linode
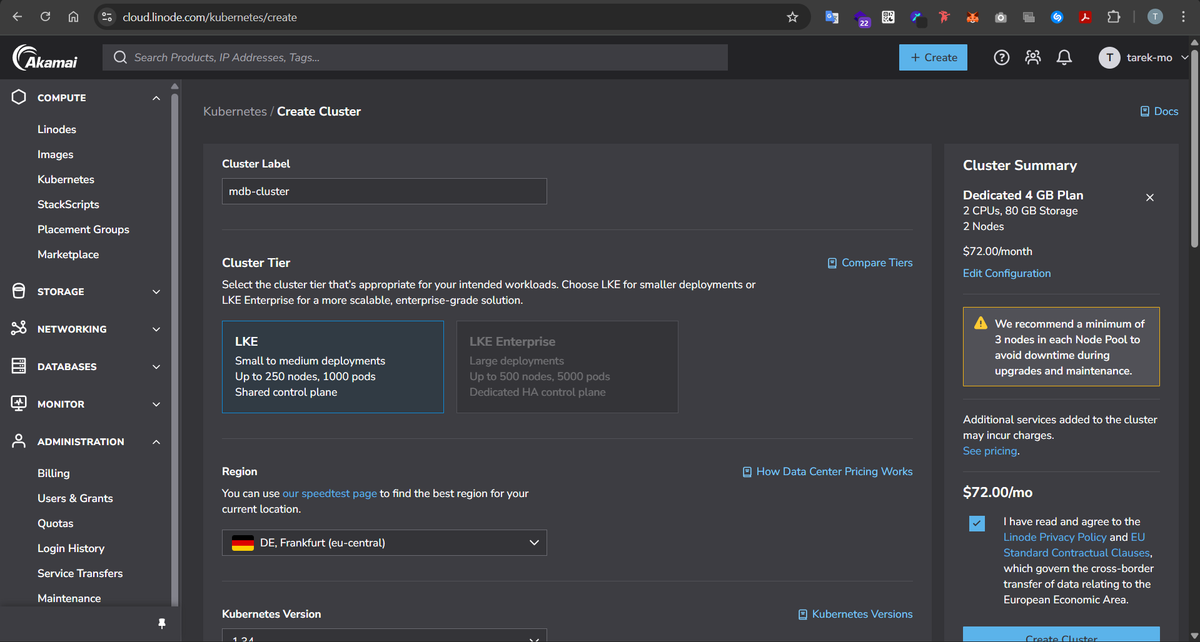
The first step was to create the Kubernetes cluster itself. Linode makes this really easy with LKE:
- I created a cluster with 2 worker nodes, just enough to test high availability and pod scheduling.
- Linode handled all the networking behind the scenes—VPCs, subnets, node networking—so I didn’t need to manually set up public and private subnets like in AWS.
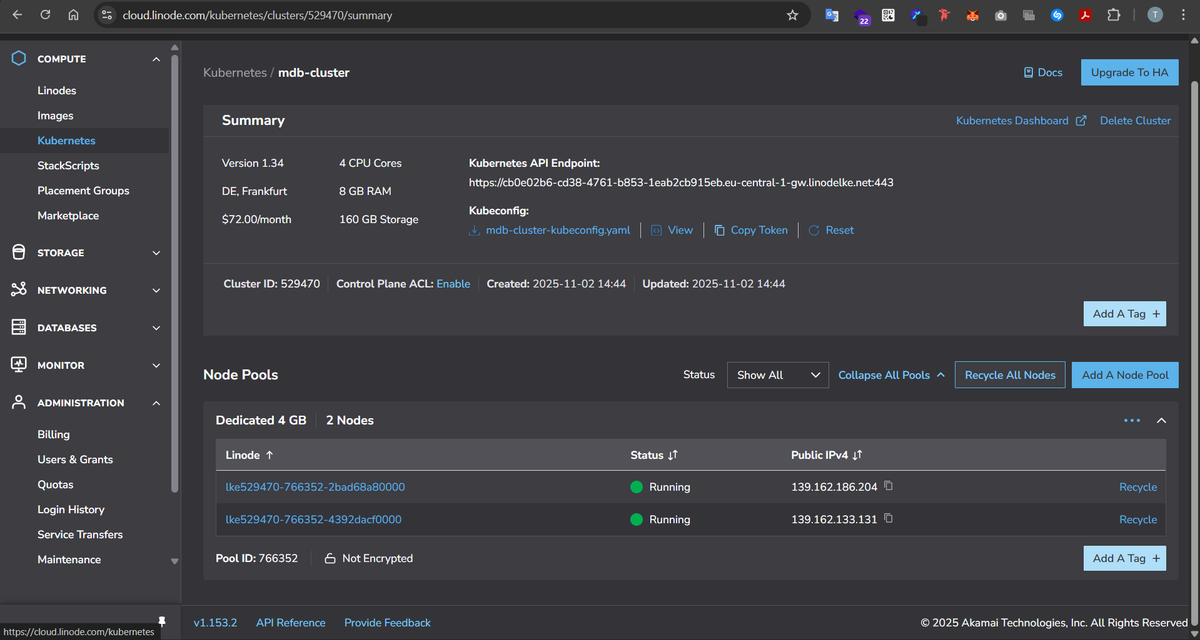
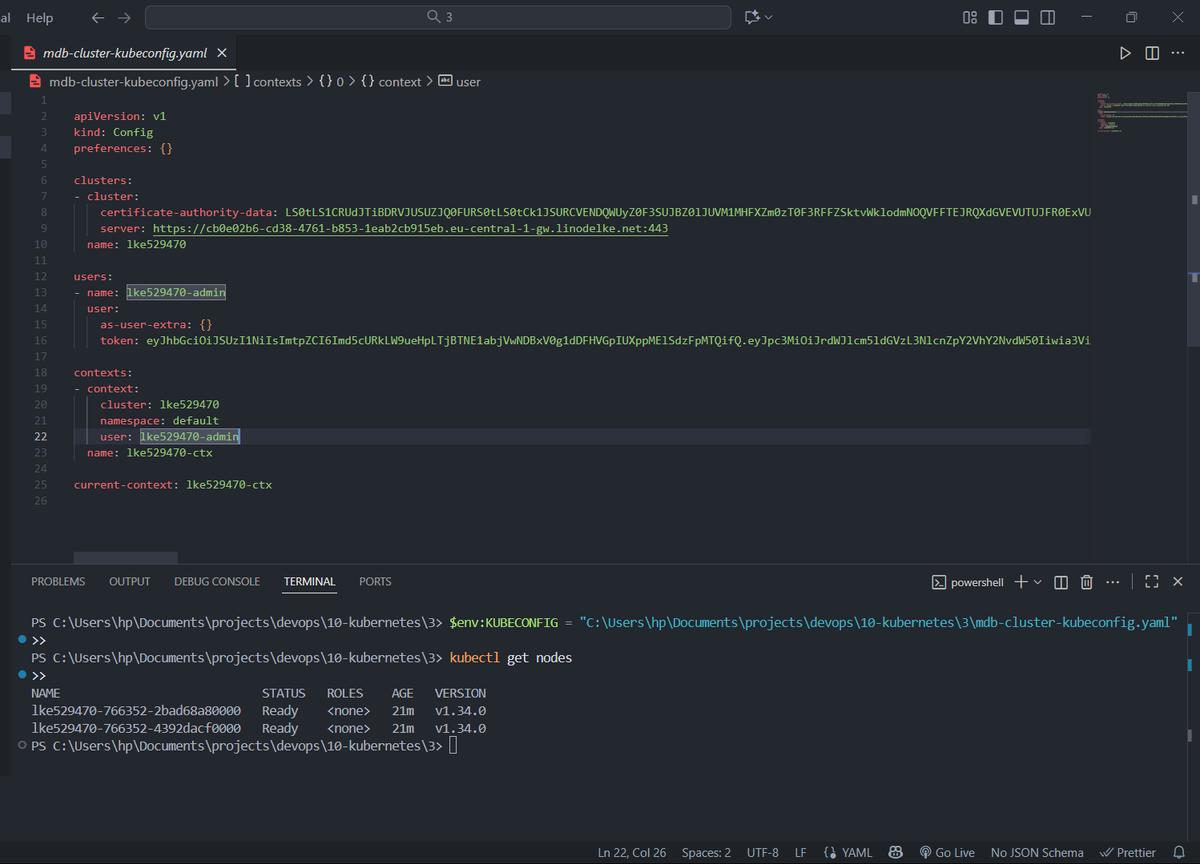
Once the cluster was ready, Linode gave me a mdb-cluster-kubeconfig.yaml file to connect locally.
2- Deploying MongoDB as a StatefulSet
Next, I wanted a replicated MongoDB cluster, with 1 primary, 2 secondaries, and an arbiter. I went with Helm for simplicity:

Then I ran:
helm install mongodb --values helm-mongodb.yaml bitnami/mongodb
which created the underlying persistent volumes for my 3 mongodb pods, aswell as the pods themselves, and all other necessary k8s ressources.
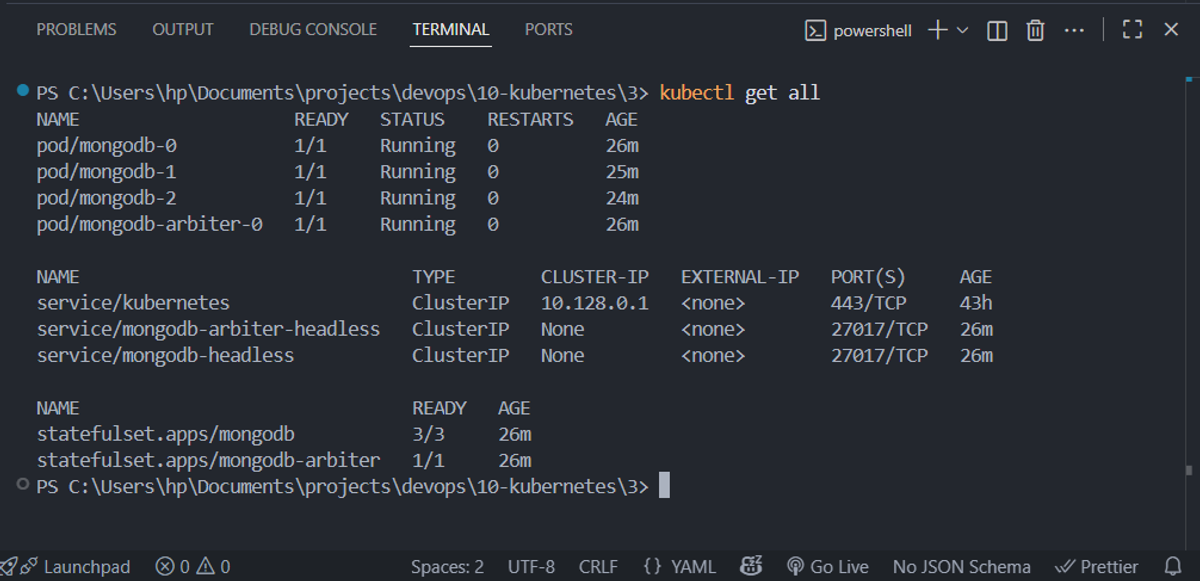
Here’s what was created under the hood:
- StatefulSet for MongoDB → 3 pods with stable names (mongodb-0, mongodb-1, mongodb-2). This ensures that even if a pod restarts, it keeps the same identity and its persistent storage.
- StatefulSet for the Arbiter → a single pod that votes in elections but stores no data.
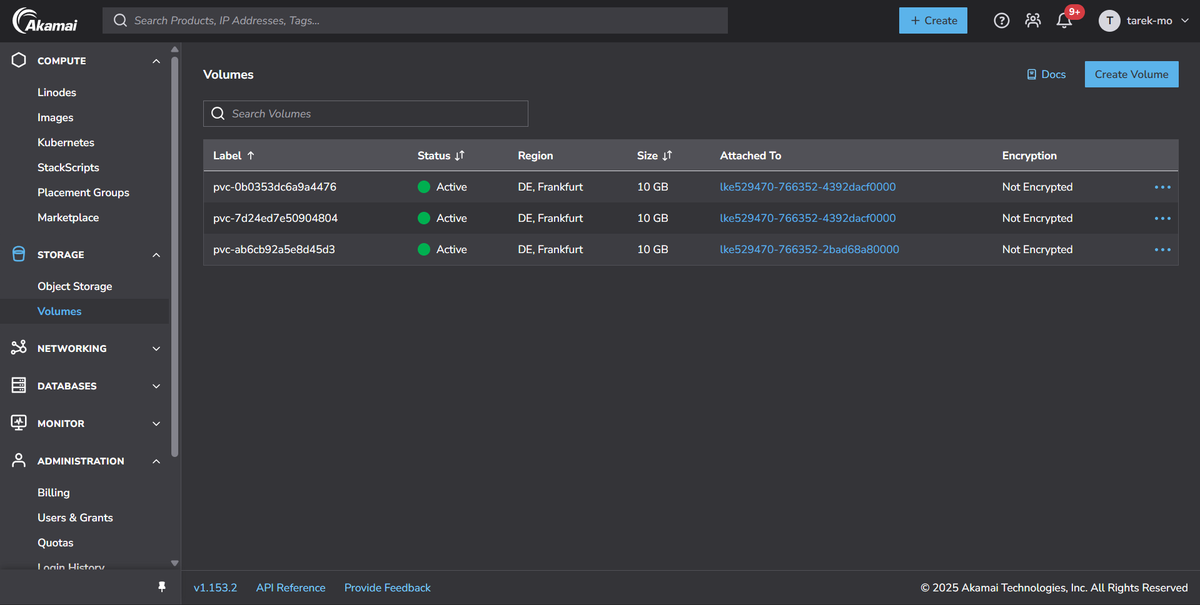
- PersistentVolumeClaims (PVCs) → each pod has its own PV to persist data. So the primary and each secondary have dedicated storage.
- Headless Services → provide stable DNS inside the cluster, so pods can find each other without a load balancer.
The primary pod handles all write requests, and the secondaries replicate data asynchronously. The arbiter participates in leader elections but doesn’t store any data.
3- Adding the Mongo Express Web UI
With MongoDB running, I wanted a way to visualize and manage the database. That’s where Mongo Express comes in.
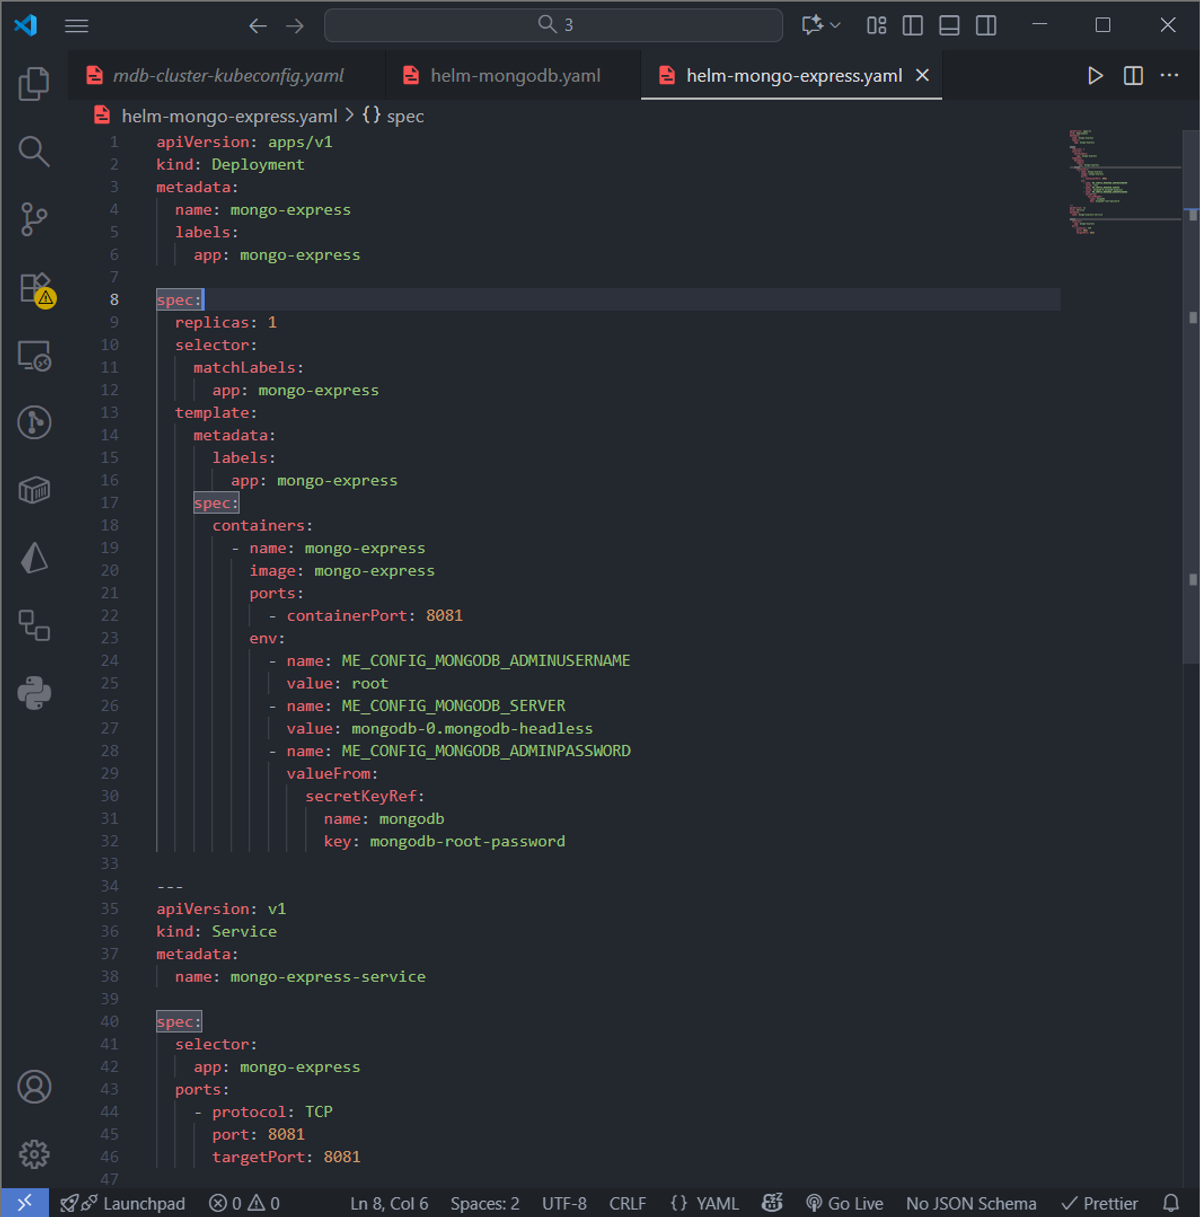
I created a Deployment with a single pod and a ClusterIP service (didn't use Helm charts here cuz I didn't feel the need to as this is just a simple 1 replica pod mongo-express):
A few things to note:
- The Deployment only has 1 replica because the web UI doesn’t need replication.
- The ClusterIP service gives the pod a stable internal DNS name.
- I pointed ME_CONFIG_MONGODB_SERVER to mongodb-0, the primary. That’s because all writes go to the primary. Reads could go to secondaries if I configured it, but Mongo Express defaults to primary for both reads and writes.
- The service attached to this deployment is of type ClusterIP, which exposes the pods just internally and not externally... exposing the 8081 port which is mapped to the pod's container internal 8081 port
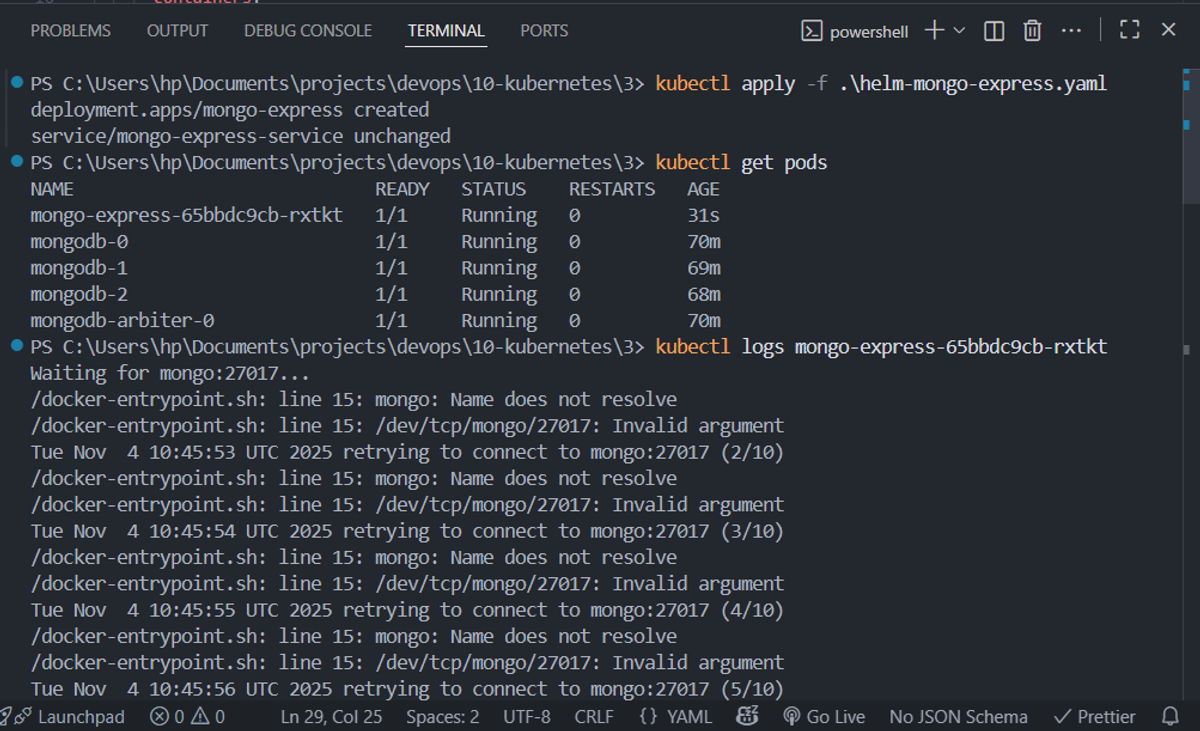
Logs after applying the mongo-express deployment:
4- Exposing Mongo Express to the Browser with Nginx Ingress
Finally, I wanted to make the UI accessible externally without exposing the pod directly. That’s where Nginx Ingress comes in.
Install the ingress controller:
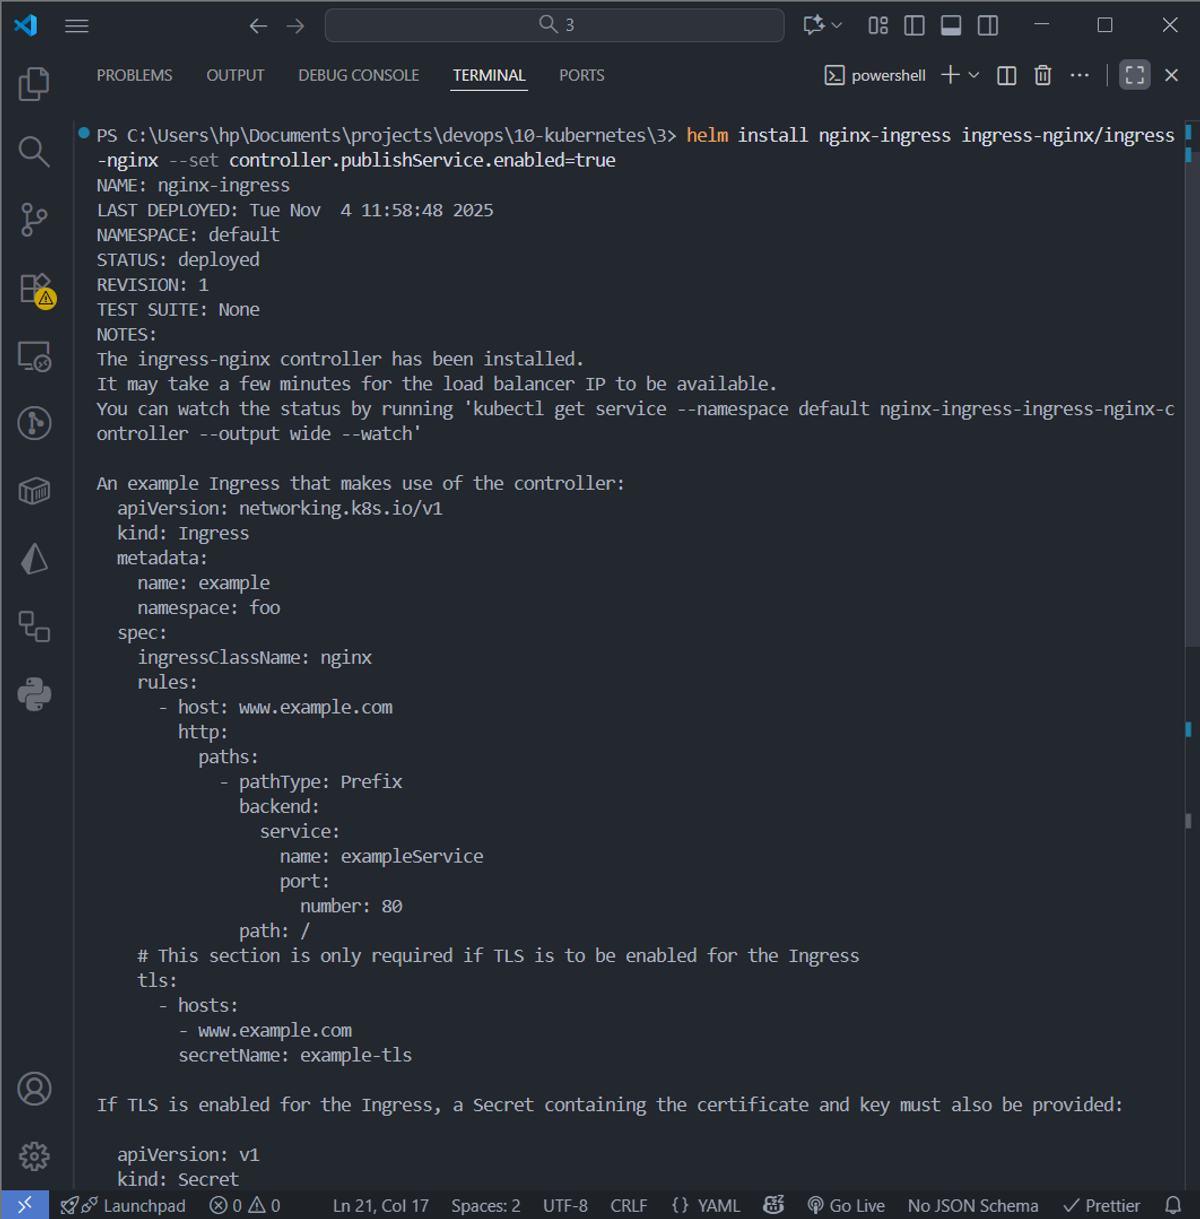
This deployed an Nginx pod that listens for incoming HTTP requests and Linode automatically created a public IP load balancer for the ingress controller, so it can accept internet traffic.
Create an Ingress resource:
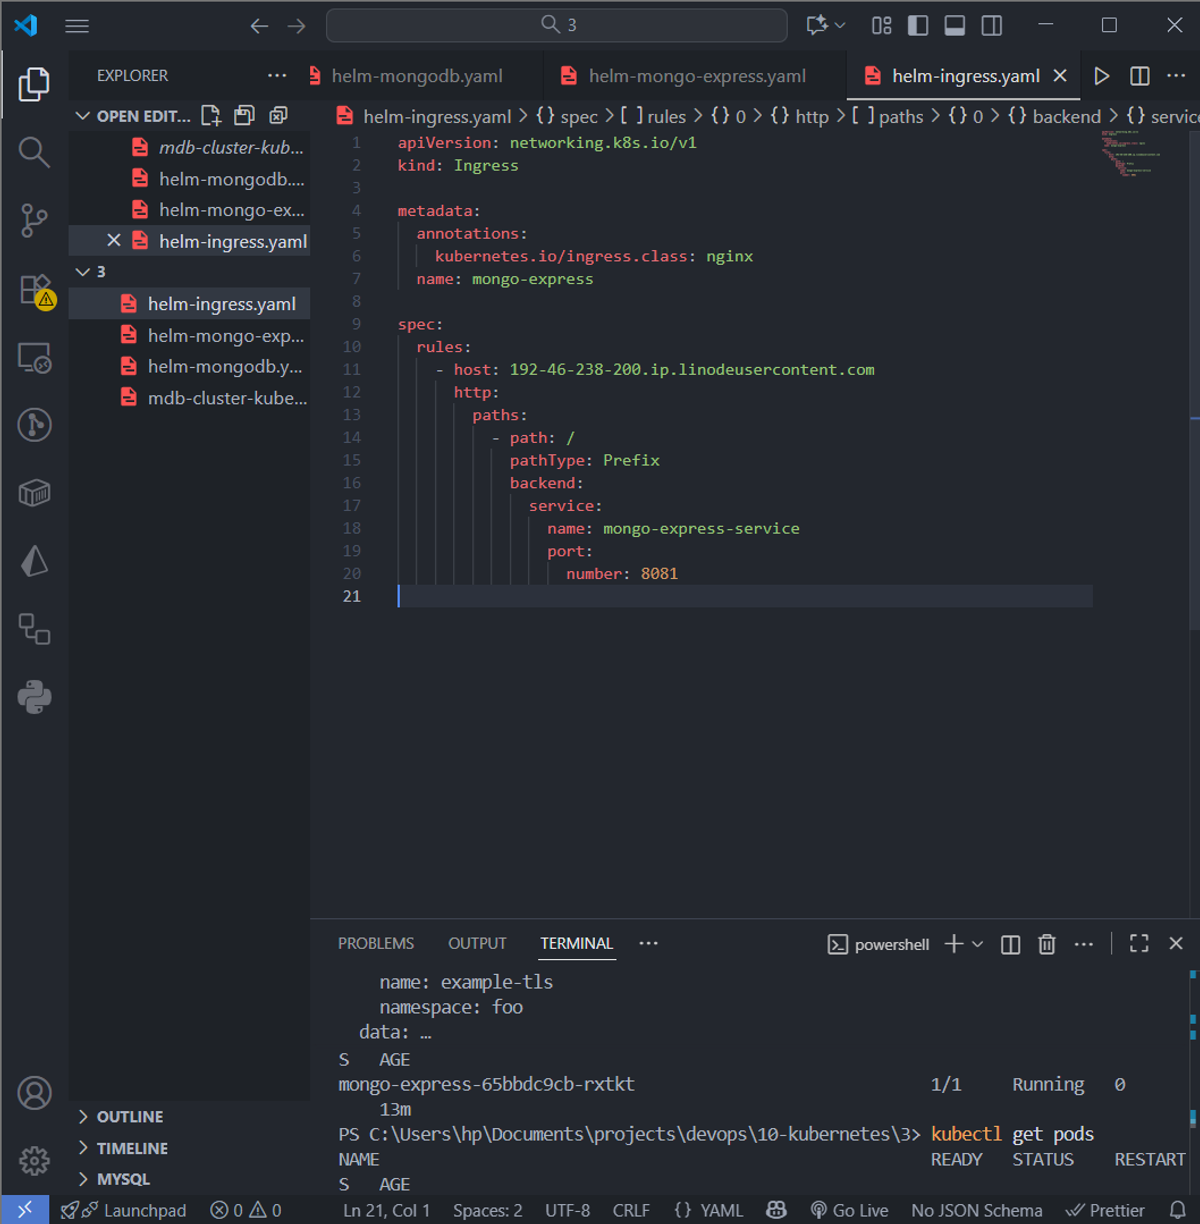
How traffic flows now:
- The ingress controller routes requests based on host and path to the internal service.
- Mongo Express connects to the MongoDB primary pod (mongodb-0) for reads/writes.
- The MongoDB secondaries replicate automatically in the background.
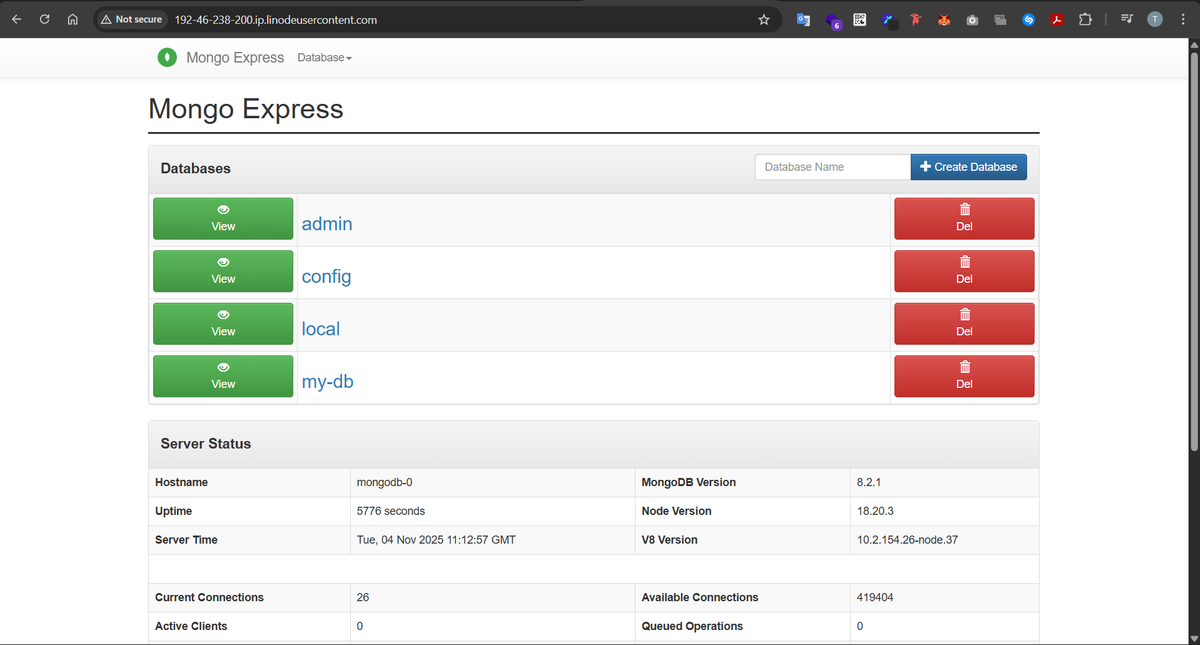
5- Accessing the mongo express web UI through the browser:
Now our mongo-express can be accessed through the web using the dns generated for the public ip address of our Linode load balancer: